
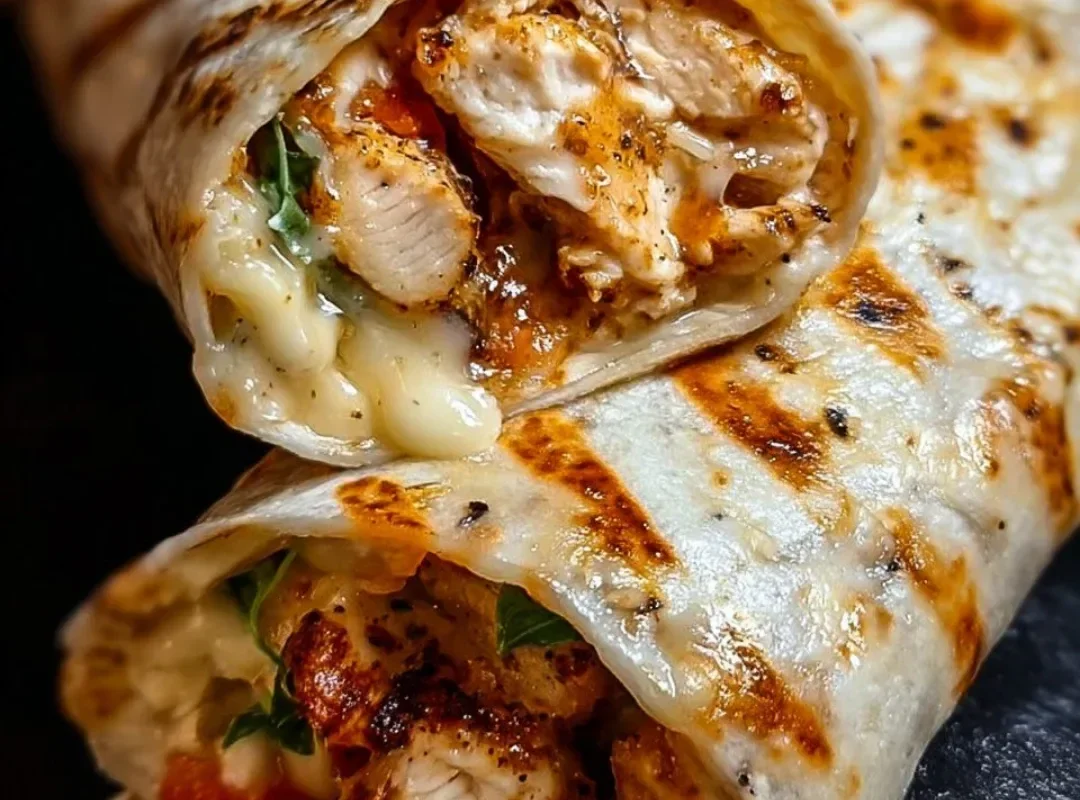
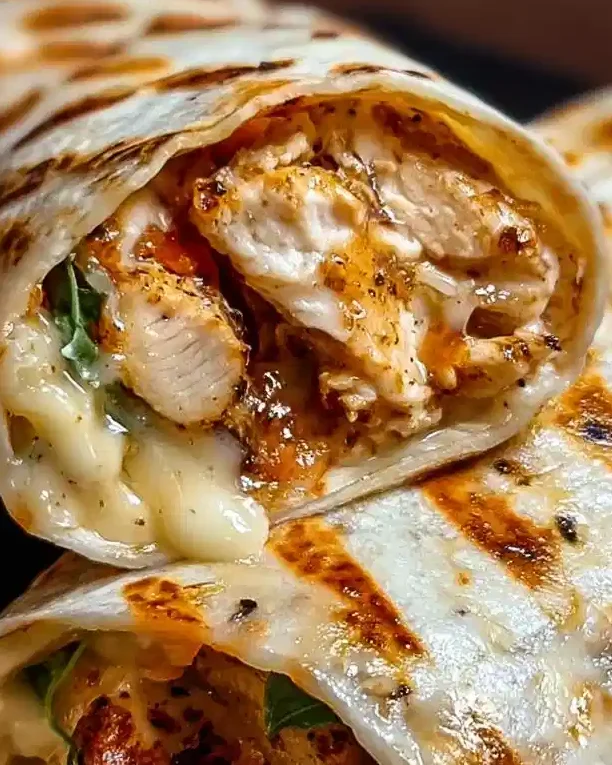
There’s something truly comforting about a warm, cheesy wrap filled to the brim with flavorful ingredients. My journey to discover the perfect wrap recipe led me to create these Ooey-Gooey Cheesy Garlic Chicken Wraps. Picture this: tender shreds of chicken mixed with creamy cheese and a generous amount of garlic, all enveloped in a soft tortilla. Whether for a family dinner or a quick lunch, these wraps are not only delicious but also incredibly easy to make. In this article, I’ll break down everything you need to know to recreate these heavenly wraps at home.
Table of Contents
Why You’ll Love This Recipe
This recipe combines the comfort of traditional chicken wraps with a cheesy twist that everyone will adore. Here are some key reasons to whip up these wraps:
- Quick and Simple to Prepare: With just a few ingredients, you can have a delicious meal ready in under 30 minutes.
- Family-Friendly Meal: Even picky eaters are likely to love the cheesy goodness packed inside these wraps.
- Great for Beginners: The straightforward instructions make this recipe perfect for novice cooks.
- Customizable Flavor: Adjust ingredients to suit your family’s tastes; add some spice or extra veggies if you’d like!
- Perfect for Meal Prep: Make a batch ahead of time, and you’ll have meals ready for busy days.
Ingredients
To get started on your Ooey-Gooey Cheesy Garlic Chicken Wraps, you will need the following ingredients:
- 2 cups cooked chicken, shredded
- 1 cup shredded mozzarella cheese
- 1/2 cup cream cheese, softened
- 1/4 cup garlic, minced
- 1/4 cup fresh parsley, chopped
- 4 large tortillas
- 1 tablespoon olive oil
- Salt and pepper to taste
Step-by-Step Instructions
Creating these delicious wraps is a breeze. Follow these simple steps:
- In a large mixing bowl, combine the shredded chicken, mozzarella cheese, softened cream cheese, minced garlic, and chopped parsley. Ensure the mixture is well-combined for balanced flavor.
- Season the mixture with salt and pepper to taste. This enhances the overall flavor of the filling.
- Lay out the tortillas on a flat surface. Evenly distribute the chicken mixture among each tortilla, ensuring each wrap is generously filled.
- Roll the tortillas tightly, forming wraps. Make sure the filling is completely enclosed to prevent any spillage during cooking.
- Heat olive oil in a skillet over medium heat. This helps achieve a golden-brown exterior on your wraps.
- Place the wraps seam-side down in the skillet. Cook until golden brown, which typically takes about 3-4 minutes on each side.
- Once cooked, remove them from the skillet, slice into pieces, and serve warm.
Pro Tips and Variations
To elevate your Ooey-Gooey Cheesy Garlic Chicken Wraps, consider these pro tips:
- Add Veggies: Include some spinach, bell peppers, or even mushrooms into the mixture for added nutrition and texture.
- Spicy Twist: If you love heat, consider adding a dash of hot sauce or jalapeños for a kick.
- Alternative Cheeses: Try different cheese varieties, such as pepper jack or cheddar, to switch up the flavor profile.
- Grilled Flavor: If you prefer, grill the wraps instead of pan-frying them; this adds a nice charred flavor.
- Freezing Options: If you’d like to make these ahead of time, freeze the uncooked wraps in an airtight container, and simply cook from frozen when needed.
How to Serve Ooey-Gooey Cheesy Garlic Chicken Wraps
These wraps pair beautifully with a variety of side dishes:
- Salad: A light salad with a vinaigrette dressing provides a fantastic contrast to the rich flavors of the wrap.
- Dipping Sauces: A side of ranch or garlic aioli for dipping enhances the eating experience.
- Fresh Fruits: Consider serving with a side of fresh fruit for a touch of sweetness.
- Rice or Quinoa: Pair these wraps with a bed of rice or quinoa for a heartier meal.
How to Store
If you have leftovers (which is unlikely, but just in case), here is how to store them properly:
- In the Fridge: Keep wrapped in an airtight container. They’ll last for about 3-4 days.
- In the Freezer: Store the wraps in an airtight freezer-friendly container or wrap them securely in foil. They can last for about 2-3 months.
- Reheating: To reheat, place the wrap in a skillet over medium heat, cooking until heated through to preserve texture. Alternatively, microwave for about 1-2 minutes, but note that this may make the tortilla softer.
Nutrition Information
Each serving of Ooey-Gooey Cheesy Garlic Chicken Wraps roughly contains:
- Calories: 380
- Protein: 28g
- Total Carbohydrates: 30g
- Total Fat: 20g
- Sodium: 580mg
These wraps provide a good balance of protein and carbs, making them a satisfying meal choice.
FAQs
Can I use rotisserie chicken for this recipe?
Absolutely! Rotisserie chicken adds great flavor and saves time on preparation.
Are these wraps suitable for meal prep?
Yes! They store well and can be prepared in advance for quick meals throughout the week.
Can I make these wraps gluten-free?
Certainly! Just opt for gluten-free tortillas to make this recipe accessible for those with gluten sensitivities.
How can I make these wraps vegetarian?
Simply replace the chicken with a mix of sautéed vegetables or black beans for a tasty vegetarian option.
Conclusion
If you’re looking for a quick, delicious meal that the whole family will love, give these Ooey-Gooey Cheesy Garlic Chicken Wraps a try. They’re simple to make, flavorful, and incredibly satisfying. Share your experience with these wraps; I would love to hear how they turned out for you! Enjoy your cooking adventure

Ooey-Gooey Cheesy Garlic Chicken Wraps
Ingredients
Method
- In a large mixing bowl, combine the shredded chicken, mozzarella cheese, softened cream cheese, minced garlic, and chopped parsley. Ensure the mixture is well-combined for balanced flavor.
- Season the mixture with salt and pepper to taste.
- Lay out the tortillas on a flat surface. Evenly distribute the chicken mixture among each tortilla.
- Roll the tortillas tightly, forming wraps.
- Heat olive oil in a skillet over medium heat.
- Place the wraps seam-side down in the skillet. Cook until golden brown, about 3-4 minutes on each side.
- Once cooked, remove them from the skillet, slice into pieces, and serve warm.