

The first time I discovered Grilled Cheese Roll-Ups, I was in a cozy café, surrounded by the comforting aroma of melting cheese and warm bread. I couldn’t resist the playful presentation of a classic comfort food rolled into bite-sized pieces. As I took a bite, the combination of crispy outside and gooey inside took me back to childhood, reminding me of lazy afternoons spent making sandwiches with my mom. This delightful recipe is not only nostalgic but also incredibly quick and easy to whip up, making it perfect for a snack or a meal. Whether you’re cooking for yourself or entertaining guests, Grilled Cheese Roll-Ups are sure to impress.
What is Grilled Cheese Roll-Ups
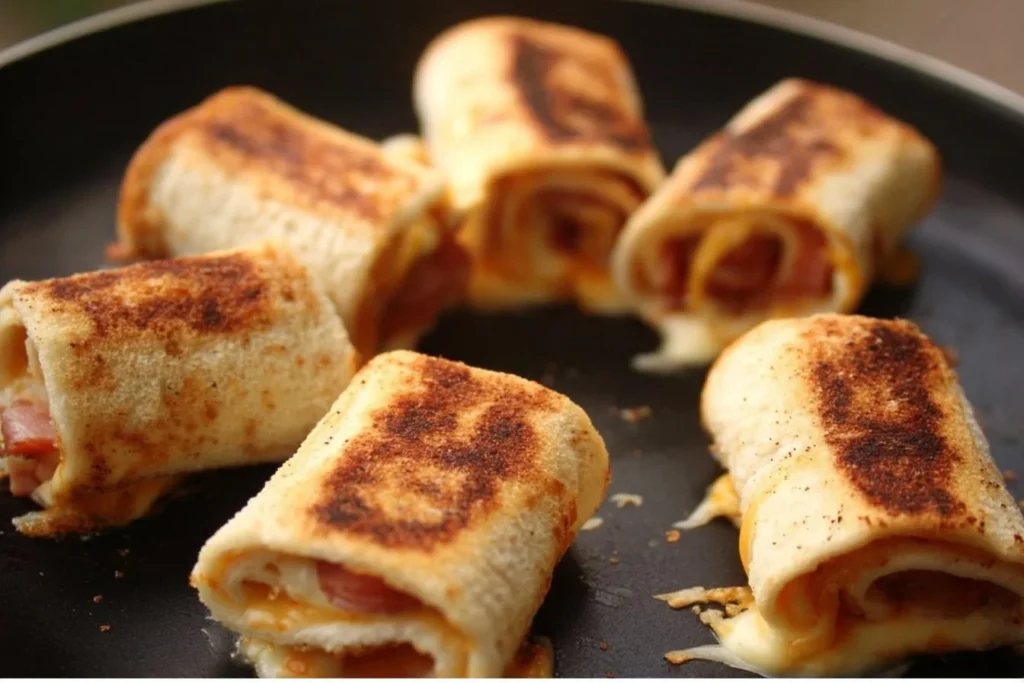
Grilled Cheese Roll-Ups are a whimsical twist on the traditional grilled cheese sandwich. Instead of the usual slice of bread and cheese stacked together, this version involves rolling cheese inside flattened slices of bread, then toasting them until golden and crispy. The beauty of this recipe lies in its versatility; you can customize it with various cheeses and add-ins according to your taste. Plus, they’re easy to dip in your favorite sauces or accompany with sides, making them ideal for gatherings, kids’ lunches, or grown-up snacks.
Why You’ll Love This Grilled Cheese Roll-Ups:
There are plenty of reasons to adore these delicious roll-ups:
- Quick and simple to prepare, perfect for busy weeknights.
- Family-friendly meal that kids can help with, encouraging bonding in the kitchen.
- Great for beginners; few ingredients and easy techniques will boost your cooking confidence.
- Customizable with the option to use different types of cheese, add ham or turkey, or even experiment with herbs and spices.
- Ideal for parties or game nights; serve them with dip for a fun and interactive experience.
Making Grilled Cheese Roll-Ups is a simple pleasure that can bring a smile to anyone’s face. They capture the essence of comfort food while also lending themselves well to creativity.
Ingredients
To make your Grilled Cheese Roll-Ups, you’ll need the following ingredients:
- 6 slices of bread (white, whole wheat, or your choice)
- 1 cup thinly shredded cheese (cheddar, mozzarella, or a mix)
- 6 thinly sliced pieces of ham (optional)
- 2 tablespoons of butter (for frying)
These ingredients create a deliciously cheesy and satisfying dish that can be enjoyed at any time of the day.
Step-by-Step Instructions for Grilled Cheese Roll-Ups
1. Start by trimming the crusts off the slices of bread to ensure a clean roll without any tough edges.
2. Use a rolling pin to flatten each slice of bread gently, creating an even surface for rolling.
3. Evenly distribute the shredded cheese over the flattened bread slices, leaving a little space at the edges. If you’re including ham, place the slices over the cheese.
4. Carefully roll up each slice tightly, ensuring the filling stays inside. A toothpick can help hold the roll-ups together if necessary.
5. Heat a skillet over medium to medium-low heat and add the butter, allowing it to melt completely and coat the pan.
6. Place the rolled sandwiches in the skillet, cooking for about 5 to 8 minutes. Turn them occasionally until they are golden brown and crispy all over.
7. Once cooked, remove the roll-ups from the skillet and allow them to cool for a moment before cutting them in half for easier handling.
These simple steps will lead you to a mouth-watering dish that everyone will crave.
Pro Tips and Variations:
To enhance your Grilled Cheese Roll-Ups, consider trying these pro tips and variations:
- Experiment with different cheeses. While cheddar is classic, trying a blend of mozzarella and pepper jack can add an exciting kick.
- For a healthy twist, use whole grain or gluten-free bread.
- Veggie lovers can add thin strips of bell peppers or spinach inside for extra flavor and nutrition.
- Try using a flavored cream cheese spread instead of shredded cheese for a creamy filling.
- If you’re feeling adventurous, incorporate sliced jalapeños for an added spice.
- Air frying these roll-ups can yield healthier results while maintaining crispiness without excessive oil.
These ideas can help you customize the recipe to fit your taste preferences and dietary needs.
How to Serve Grilled Cheese Roll-Ups
Grilled Cheese Roll-Ups are best served warm and can be paired with a variety of delicious sides:
- Serve them with marinara sauce for dipping, bringing in a fun Italian twist.
- A side of fresh salad drizzled with vinaigrette complements the richness of the roll-ups beautifully.
- Enjoy them with a cup of tomato soup; the combination is a nostalgic classic that never fails to satisfy.
- For a heartier meal, add some sweet potato fries or a quinoa salad for an added nutritional punch.
These roll-ups make for a fun, shareable appetizer that everyone will enjoy.
How to Store Grilled Cheese Roll-Ups
If you find yourself with leftovers, storing them properly is key to keeping their deliciousness intact. Place any uneaten roll-ups in an airtight container and refrigerate them for up to 3 days. For longer storage, consider freezing them. Wrap each roll tightly in plastic wrap and then in aluminum foil before placing them in the freezer; they can last up to 2 months when frozen.
To reheat, removing them from the wrapping and placing them back in a skillet over medium heat will bring back their crispy texture. Alternatively, using an air fryer can also work wonders. Heat them for about 5 minutes at 350 degrees Fahrenheit, and you’ll have roll-ups as good as new.
Nutrition Information
While the nutritional content may vary based on ingredients used, a typical serving of Grilled Cheese Roll-Ups can provide a reasonable amount of:
- Calories: Approximately 300
- Protein: 15g
- Carbohydrates: 30g
- Fat: 15g
- Fiber: 2g
These roll-ups serve as a fulfilling snack or meal option without overwhelming calorie counts, making them enjoyable for most dietary plans.
FAQs Grilled Cheese Roll-Ups
1. **Can I use different types of bread for Grilled Cheese Roll-Ups?**
Absolutely! You can use any bread of your choice, including gluten-free options or even tortillas for a fun twist.
What cheese works best in this recipe?
Cheddar and mozzarella are popular choices, but you can use any meltable cheese. Experiment with your favorites!Can I make these roll-ups in advance?
Yes, you can prepare them ahead of time. Just store them in the refrigerator and heat them right before serving.Are there vegetarian options for the filling?
Yes! You can replace meat with veggies like roasted peppers, spinach, or mushrooms to create a delightful vegetarian version.
Conclusion
Grilled Cheese Roll-Ups offer a delightful blend of nostalgia and flavor, making them a must-try in any kitchen. Their simplicity and adaptability allow for endless variations, ensuring that you never get bored of them. Whether you’re enjoying them alone or sharing with friends and family, these roll-ups are bound to bring joy and satisfaction with every bite. So, gather your ingredients, get rolling, and experience the deliciousness for yourself. Share your experience and let the tasty memories unfold!
Grilled Cheese Roll-Ups
Ingredients
Method
- Start by trimming the crusts off the slices of bread to ensure a clean roll without any tough edges.
- Use a rolling pin to flatten each slice of bread gently, creating an even surface for rolling.
- Evenly distribute the shredded cheese over the flattened bread slices, leaving a little space at the edges. If you’re including ham, place the slices over the cheese.
- Carefully roll up each slice tightly, ensuring the filling stays inside. A toothpick can help hold the roll-ups together if necessary.
- Heat a skillet over medium to medium-low heat and add the butter, allowing it to melt completely and coat the pan.
- Place the rolled sandwiches in the skillet, cooking for about 5 to 8 minutes. Turn them occasionally until they are golden brown and crispy all over.
- Once cooked, remove the roll-ups from the skillet and allow them to cool for a moment before cutting them in half for easier handling.