

While I was researching ways to provide a safe and comfortable home for my backyard chickens, I stumbled upon the concept of a Pallet Chicken Coop. The idea of utilizing old pallets not only sparked my creativity but also seemed like an excellent way to build a structure that’s both cost-effective and functional. After reading various articles on the subject, it became clear that a well-constructed pallet coop could be the perfect solution for anyone wanting to embrace backyard chicken-keeping.
What is Pallet Chicken Coop
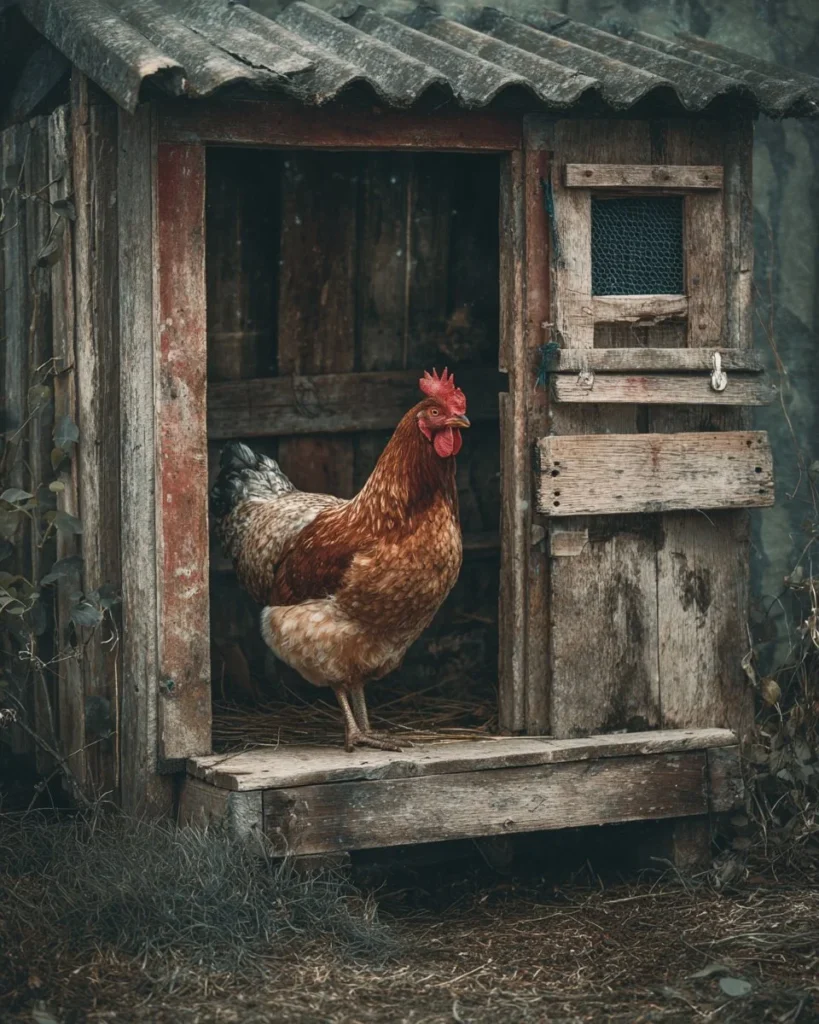
A Pallet Chicken Coop is a DIY poultry housing solution made primarily from wooden pallets, which are typically used for shipping goods. These coops offer a sustainable, affordable, and customizable option for chicken keepers. By leveraging the strength and durability of pallets, one can create a coop that provides shelter, safety, and ample space for chickens to roam and lay eggs. Pallets are relatively easy to source and can often be obtained for free from local businesses, making them an appealing choice for budget-conscious individuals.
Additionally, building a pallet chicken coop allows for creativity in design. You can construct various styles and configurations, whether it’s a simple box structure or a more elaborate setup with nesting boxes and perches. They can be painted or stained to match your backyard aesthetic, giving you the freedom to personalize your poultry home.
Why You’ll Love This Pallet Chicken Coop:
This DIY project comes with numerous benefits that make it an attractive option for both novice and experienced chicken keepers.
- Quick and simple to prepare: With basic tools and guidance, you can have your coop ready in no time.
- Eco-friendly and sustainable: Utilizing recycled materials reduces waste while providing an excellent shelter for your chickens.
- Cost-effective: Pallets are often free or very cheap, allowing you to save money while still creating a functional coop.
- Customizable to your needs: Easily modify the coop’s size and features to meet the specific requirements of your flock.
- Durable and long-lasting: Wood pallets are sturdy, protecting your chickens from predators and keeping them comfortable.
Choosing a pallet chicken coop is not just about keeping chickens; it’s about embracing a sustainable lifestyle that combines creativity with practicality.
Ingredients
While there aren’t traditional ingredients as you would find in a recipe, the materials needed to construct a pallet chicken coop include:
– Wooden pallets (enough to create the desired size of the coop)
– Outdoor wood screws
– Hinges for doors
– Roofing materials (such as metal sheets, shingles, or tarp for waterproofing)
– Optional insulation and paint/stain for aesthetics
Gathering these materials is essential for ensuring that the coop is functional and appealing.
Step-by-Step Instructions for Building a Pallet Chicken Coop
Creating a pallet chicken coop can be an enjoyable and rewarding project. Here’s a step-by-step guide to get you started:
Plan Your Design: Before you begin, sketch out your coop’s layout, including dimensions, door placement, and any added features like nesting boxes or perches. This will help ensure your coop meets your flock’s needs.
Source and Prepare Pallets: Look for high-quality pallets that are in good condition. Make sure they are free of chemicals or mold. Disassemble the pallets carefully if necessary, and sand any rough edges.
Construct the Base: Lay out a solid base using pallets to create a frame. Secure them together with wood screws. Ensure that the base is level to prevent any issues later on.
Build the Walls: Attach additional pallets vertically to create the walls of the coop. Leave space for a door and windows for ventilation. Secure all joints with screws to ensure stability.
Install the Roof: Use sheets of metal or wood to cover the top. This will protect your chickens from rain and harsh sunlight.
Add Features: Install nesting boxes and perches inside the coop. You can create these from leftover pallets or other wood. There should be enough space for every chicken to have its own nesting area.
Finish Up: Paint or stain the outside of the coop if desired. Make sure to check for any sharp edges or splinters that could harm your chickens.
Introduce Your Flock: Once your coop is complete, it’s time to introduce your chickens! Make sure they have enough food and fresh water.
This step-by-step guide can help anyone successfully build their own pallet chicken coop, providing a safe haven for their chickens.
Pro Tips and Variations:
Here are some helpful tips and variations to consider while building or improving your pallet chicken coop:
- Insulation: If you live in a colder climate, add insulation between the pallets for extra warmth during winter months.
- Mobile Coop Design: Consider making a mobile coop that you can move around to give your chickens fresh ground to forage on.
- Predator Protection: Reinforce the coop’s entrances with hardware cloth instead of standard chicken wire, as it provides better protection against predators.
- Run Addition: Build a chicken run attached to the coop to give your flock more space to roam safely.
- Natural Light: Ensure the coop has windows for natural light, which benefits the chickens’ egg-laying process.
Tailoring your pallet chicken coop with these pro tips can enhance functionality and ensure the comfort of your chickens.
How to Serve Your Chickens Well
Serving your chickens well isn’t about food in the traditional sense, but rather providing an enriching environment for them. Here are ideas for enhancing their living experience:
- Foraging Opportunities: Throw some vegetables or grains around the coop to encourage natural foraging behavior.
- Bedding Additions: Use straw or wood shavings for bedding, as they provide comfort and help absorb odors.
- Water Stations: Ensure that clean water is always available. Frequent checking of water levels can help maintain their overall health.
- Dust Bathing Areas: Provide a designated space filled with dirt or sand to allow chickens to dust bathe, which helps keep their feathers clean and free of pests.
By creating an engaging environment, your chickens will thrive and provide you with fresh eggs.
How to Store Leftovers or Extras
If you have spare materials or need to store equipment used for your pallet chicken coop, follow these storage tips:
- Palet Storage: Keep unused pallets stacked in a dry, well-ventilated area to avoid rot or insect infestation.
- Tools: Store your tools in a toolbox or shed to keep them organized and protected from the elements.
- Recycling Leftovers: If you have leftover wood or materials after building, consider using them for future projects or repairs around the yard.
- Maintenance Supplies: Keep feed and bedding stored in airtight containers to maintain their quality and prevent pests.
Following these storage tips will not only ensure your materials remain in good condition but can also help you optimize your space for future projects.
Nutrition Information
While there isn’t a conventional meal involved in a pallet chicken coop, the diet of your chickens is crucial. Here’s a basic overview of their nutritional needs:
- Protein: Chickens require protein for growth and egg production. A balanced diet should contain at least 16% protein.
- Vitamins: Greens, vitamins, and minerals are essential for overall health. Incorporate leafy greens, vegetables, and grains.
- Water: Fresh and clean water is non-negotiable. Chickens need constant access to hydration.
- Supplemental Feed: Consider offering fortified feed to ensure they receive all necessary nutrients.
Ensuring a balanced diet will lead to healthier, happier chickens.
FAQs about Pallet Chicken Coop
1. **Can I use any type of pallet for chicken coops?**
It’s best to use heat-treated pallets that are not chemically treated. Look for HT markings.
How big should a pallet chicken coop be?
The coop size varies based on the number of chickens. A common recommendation is 4 square feet per chicken inside the coop.How long does it take to build a pallet chicken coop?
Depending on your skills and design complexity, a basic coop can take a few hours to a couple of days to build.Do I need a permit to build a chicken coop?
This varies by location. Check local regulations regarding livestock housing in your area before starting your project.
Conclusion
Building a pallet chicken coop is a rewarding project that combines sustainability, creativity, and practicality. Not only will you provide a safe haven for your chickens, but you’ll also create a unique addition to your backyard. The benefits of using pallets make this an appealing option for fellow hobbyists and beginners alike. I encourage you to try your hand at building a pallet chicken coop and share your experience with others. You’ll likely find immense joy in nurturing your flock, enjoying fresh eggs, and connecting with nature.
Pallet Chicken Coop
Ingredients
Method
- Plan Your Design: Sketch out your coop’s layout, including dimensions, door placement, and features.
- Source and Prepare Pallets: Obtain high-quality, chemical-free pallets and prepare them for use.
- Construct the Base: Lay a solid base using pallets, securing them with wood screws.
- Build the Walls: Attach pallets vertically to create walls, leaving space for doors and windows.
- Install the Roof: Use roofing materials to cover the coop and protect it from weather.
- Add Features: Install nesting boxes and perches inside using additional pallets or wood.
- Finish Up: Optionally paint or stain the coop and check for sharp edges before introducing chickens.
- Introduce Your Flock: Once the coop is complete, introduce your chickens and ensure they have food and water.