
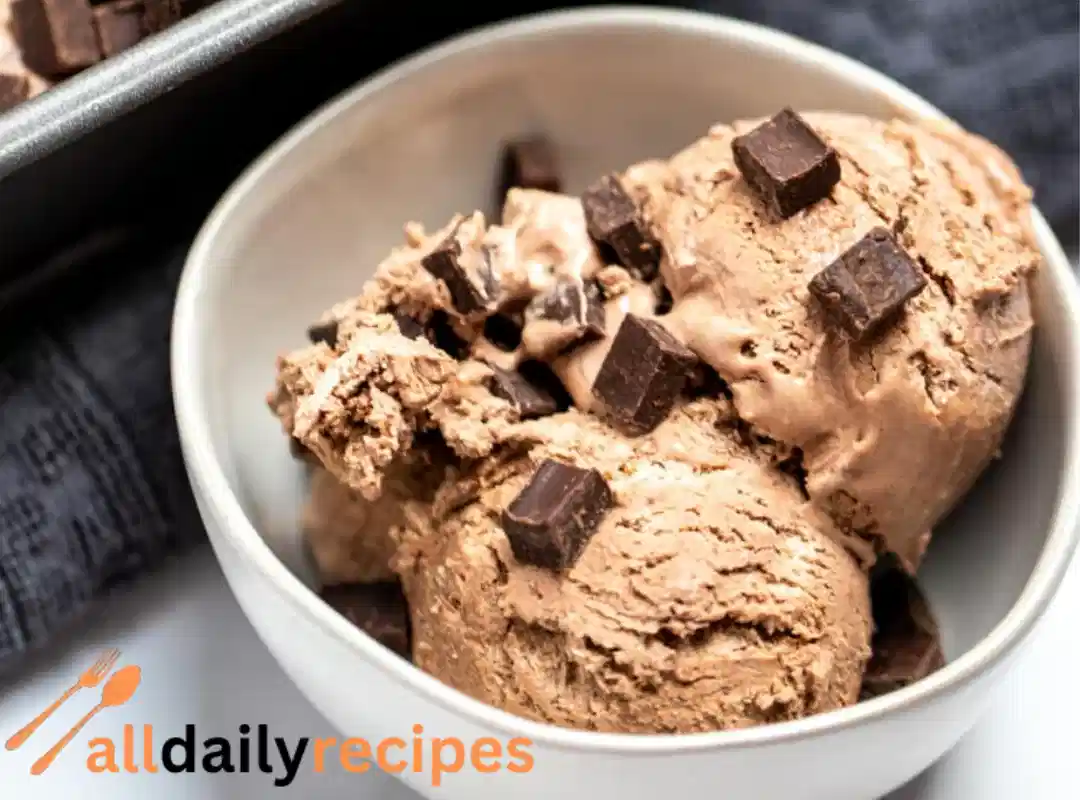
Making homemade chocolate ice cream without machine might sound like a stretch, but it’s surprisingly easy with the right ingredients and method. Instead of churning, this recipe relies on heavy cream and sweetened condensed milk to create a creamy texture. When whipped, the cream introduces air, and the condensed milk provides sweetness and stability, mimicking what an ice cream maker does.
The result? A rich, scoopable chocolate ice cream that requires no fancy equipment. It’s soft, smooth, and deeply chocolaty. With just a few pantry staples and a freezer, you can enjoy real, homemade ice cream that rivals store-bought brands.
Table of Contents
Ingredients & Smart Substitutions
- 2 cups heavy cream Whipped to incorporate air and add richness
- 1 can (14 oz) sweetened condensed milk Sweetener and creamy base
- 1/2 cup unsweetened cocoa powder For bold chocolate flavor
- 1 teaspoon vanilla extract Enhances flavor depth
- Pinch of salt Balances sweetness and boosts chocolate notes
Optional Add-ins:
- 1/2 cup mini chocolate chips or chopped dark chocolate Extra texture and richness
- Chopped nuts, sea salt, or a swirl of nut butter For a gourmet touch
Substitutions:
- Use coconut cream and sweetened coconut condensed milk for a dairy-free version
- Swap cocoa powder for 4 oz melted dark chocolate for a richer finish
- Add a pinch of instant espresso to intensify chocolate flavor

Prep & Technique Tips Before Freezing
Chill tools and ingredients: Keep your mixing bowl, whisk, and cream chilled before starting. This helps the cream whip faster and stay airy.
Bloom cocoa: For deeper flavor, mix the cocoa with a small amount of warm water or hot cream to “bloom” it before adding it to the base.
Folding matters: After whipping the cream to soft or medium peaks, gently fold in the condensed milk and chocolate mixture. Use a spatula to fold slowly without deflating the cream.
Freezer container: Use a metal loaf pan or airtight plastic container. Press plastic wrap directly onto the surface of the mixture before freezing to prevent ice crystals.
Step-by-Step Method
Whip the Cream to Soft Peaks
Pour the cold heavy cream into a chilled bowl and whip with a hand mixer or stand mixer until it reaches soft or medium peaks. Don’t over-whip.
Mix the Chocolate Base
In another bowl, combine the sweetened condensed milk, cocoa powder, vanilla, salt, and any optional flavorings. Stir until smooth.
Fold Chocolate Into Cream
Gently fold the chocolate mixture into the whipped cream in batches. Use a spatula and work slowly to keep the volume intact.
Transfer to Container
Spoon the ice cream base into your prepared container. Smooth the top with a spatula. Add optional mix-ins like chocolate chips or nuts here.
Freeze & Wait
Cover the surface with plastic wrap and freeze for at least 6 hours or overnight. For smoother texture, stir once after 2 hours to reduce ice crystals.
Troubleshooting & Common Mistakes
Icy texture? Stir the ice cream gently after 2 hours of freezing, or use plastic wrap on the surface to prevent crystal formation.
Grainy or separated? May occur if ingredients weren’t fully combined or if cocoa wasn’t bloomed. Stir cocoa with warm water before adding.
Too dense? Over-folding can deflate the mixture. Work gently to keep air in the whipped cream.
Too sweet? Choose bittersweet cocoa or dark chocolate chips to balance the sweetness of condensed milk.
Variations & Dietary Tweaks
- Vegan version: Use plant-based whipping cream and coconut condensed milk
- Extra chocolate: Mix in chopped dark chocolate or swirl in melted chocolate before freezing
- Nutty swirl: Add a ribbon of almond butter, hazelnut spread, or tahini
- Fruity mix: Stir in chopped cherries or raspberries before freezing
This recipe is versatile, so feel free to experiment with flavors and mix-ins that suit your taste.
Storage, Freezing & Serving Tips
Best container: Use a metal loaf pan for quick, even freezing or a BPA-free airtight container
Prevent freezer burn: Press plastic wrap directly onto the surface and seal with a lid
Shelf life: Best enjoyed within 2 weeks for maximum creaminess
Scooping tip: Let the container sit at room temp for 5–10 minutes. Use a warm spoon for easy scooping
Garnishing ideas: Sprinkle with chocolate shavings, drizzle with chocolate sauce, or top with crushed nuts
Serving Ideas & Pairings
Serve your homemade chocolate ice cream with:
- Warm brownies or chocolate chip cookies
- Sliced bananas or fresh berries
- A dusting of cinnamon or a spoonful of peanut butter
- A glass of cold milk, iced coffee, or herbal iced tea
It’s a great dessert for family dinners, holiday celebrations, or casual evenings.
Frequently Asked Questions (FAQ)
Can I use evaporated milk instead of condensed milk?
No, it won’t provide the same sweetness or texture. Condensed milk is essential.
Why didn’t my ice cream freeze solid?
Your freezer may be too warm. Make sure it’s set to the coldest setting. Also, check the container is airtight.
Can I reduce the sweetness?
Use darker cocoa or mix in unsweetened chocolate chips
Can I churn it for better texture?
This recipe is designed for no-churn, but yes, you can use an ice cream maker if you prefer.
Can I double the recipe?
Absolutely. Just use a larger bowl and container. Whip cream in batches for best results.
Conclusion
With this easy method for homemade chocolate ice cream without machine, anyone can enjoy creamy, rich chocolate dessert from their own kitchen. There’s no need for expensive tools or complicated steps. Just whip, fold, freeze, and scoop.
It’s a fun, flexible recipe that welcomes creativity, whether you want to add a chocolate swirl, a sprinkle of sea salt, or a ribbon of nut butter. Try it once, and it might just become your new go-to frozen treat.
Homemade Chocolate Ice Cream Without Machine
Ingredients
Equipment
Method
- Step 1: Chill a mixing bowl and whisk attachments in the freezer for 10–15 minutes to help the cream whip faster and stay airy.
- Step 2: Bloom the cocoa powder by mixing it with 2–3 tablespoons of warm water or a bit of warm cream until smooth and dark. This enhances the chocolate flavor.
- Step 3: In a medium bowl, combine the sweetened condensed milk, bloomed cocoa, vanilla extract, and salt. Stir until completely smooth.
- Step 4: In the chilled bowl, whip the cold heavy cream using a hand mixer or stand mixer until soft to medium peaks form. Do not over-whip.
- Step 5: Gently fold the chocolate mixture into the whipped cream in 2–3 batches using a spatula. Work slowly to maintain the airiness of the cream.
- Step 6: Fold in any optional add-ins like chocolate chips or nuts for extra texture.
- Step 7: Transfer the mixture to a metal loaf pan or airtight container. Smooth the top, press plastic wrap directly on the surface, and seal tightly.
- Step 8: Freeze for at least 6 hours or overnight until solid. For smoother texture, gently stir after 2 hours before continuing to freeze.
- Step 9: Before serving, let the ice cream sit at room temperature for 5–10 minutes for easier scooping. Use a warm spoon for best results.
Greetings from Florida! I’m bored to tears at work so I decided to check out your website on my iphone during lunch break. I love the knowledge you present here and can’t wait to take a look when I get home. I’m amazed at how quick your blog loaded on my phone .. I’m not even using WIFI, just 3G .. Anyways, fantastic blog!
Youre so cool! I dont suppose Ive learn anything like this before. So good to find anyone with some original ideas on this subject. realy thanks for starting this up. this web site is one thing that’s wanted on the internet, someone with slightly originality. helpful job for bringing one thing new to the internet!