
Sometimes you just want fried chicken without pulling out the deep fryer. This Fried Chicken Breast Recipe is my answer to that craving. It’s pan-fried in a skillet, still gets that golden, crunchy crust, and the chicken stays nice and juicy inside.
I make this a lot on weeknights because it’s quick, uses basic ingredients, and always hits the spot. You can put it on the table with mashed potatoes and veggies, slice it into sandwiches, or even lay it over a salad. However you serve it, it’s the kind of meal that disappears fast.
No special tricks here just even cutlets, seasoned flour, hot oil with a little butter, and patience while the crust sets. Simple, but it works every time.
Table of Contents
Ingredients for Fried Chicken Breast Recipe
Here’s what you’ll need to make about 4–6 servings:
- 4 boneless, skinless chicken breasts, each halved if thick
- Salt (about ¾ tsp)
- Freshly ground black pepper (about ½ tsp)
- 2-3 cloves garlic, minced (or substitute with garlic powder if needed)
- 2 cups all-purpose flour
- 2 tsp garlic powder
- 2 tsp onion powder
- Eggs (2 large) beaten
- Parmesan cheese, freshly grated (about ¾ cup)
- Fresh parsley or dried, chopped (for flavor in coating)
- Cooking oil with high smoke point (vegetable, canola, or avocado)
- Butter (about 2 tbsp)
Optional swaps / additions:
- Use coarse breadcrumbs or panko instead of some flour for extra crunch
- Cornstarch or gluten-free flour if avoiding wheat
- Paprika or smoked paprika for color and a mild smoky note
- Herbs like thyme or oregano in place of parsley
Step-by-Step Instructions for Fried Chicken Breast
Step 1: Prep the chicken
Take your chicken breasts and lay them flat on a board. If they’re on the thicker side, carefully slice them in half so you end up with thinner cutlets. I like to cover them with parchment and give them a quick pound with my rolling pin just enough so they’re even. This way, the chicken cooks evenly and you won’t have one side dry while the other’s still raw. Sprinkle both sides with salt, pepper, and some minced garlic.
Step 2: Get your bowls ready
Set up two bowls:
- One with flour, garlic powder, and onion powder mixed together.
- The other with whisked eggs, a good handful of grated Parmesan, parsley, and just a pinch of salt.
Keep a tray handy for the dredged chicken you’ll thank yourself later when things get messy.
Step 3: Dredge and coat
Here’s the order: flour egg flour again. First, coat a piece of chicken lightly in the flour mix, shake it off, then dip it into the egg and cheese mixture. Finish with another dusting of flour, pressing it gently so the crust sticks. Place each piece on the tray and repeat until all the chicken is coated.
Step 4: Time to fry
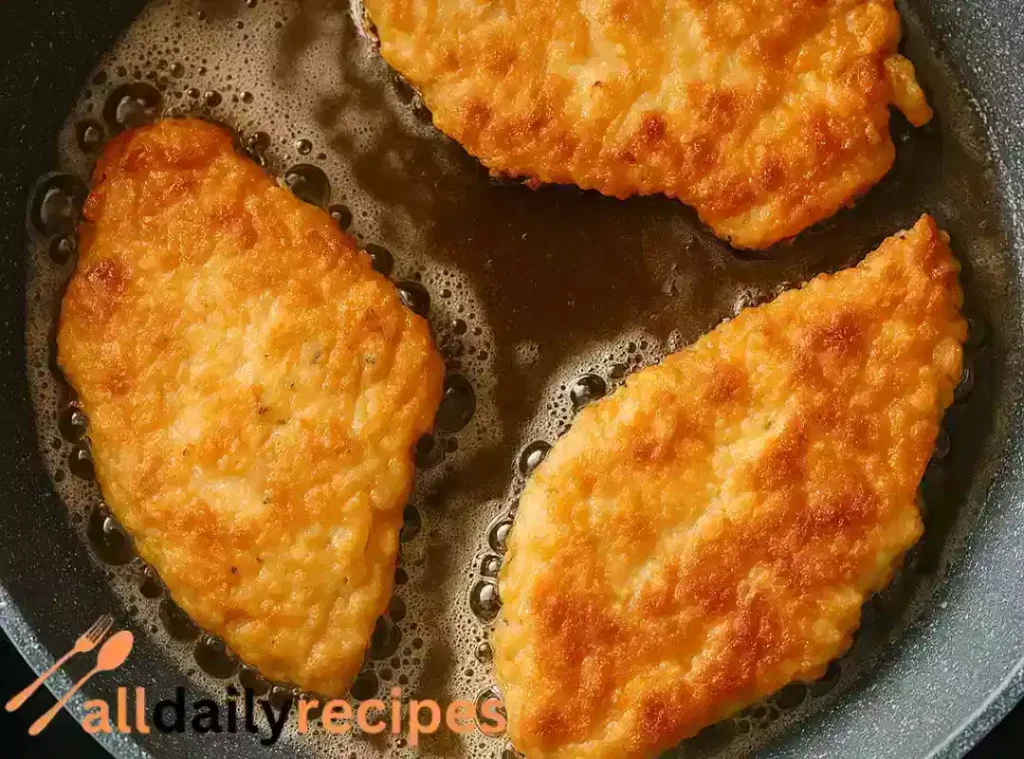
Heat a big skillet over medium. Add a spoonful of oil and a knob of butter (the butter adds that amazing flavor). Once it’s hot and sizzles when you flick in a bit of flour, lay down a few cutlets don’t crowd the pan. Fry them without touching for about 4–5 minutes, then flip and cook the other side. You’re aiming for that deep golden brown crust.
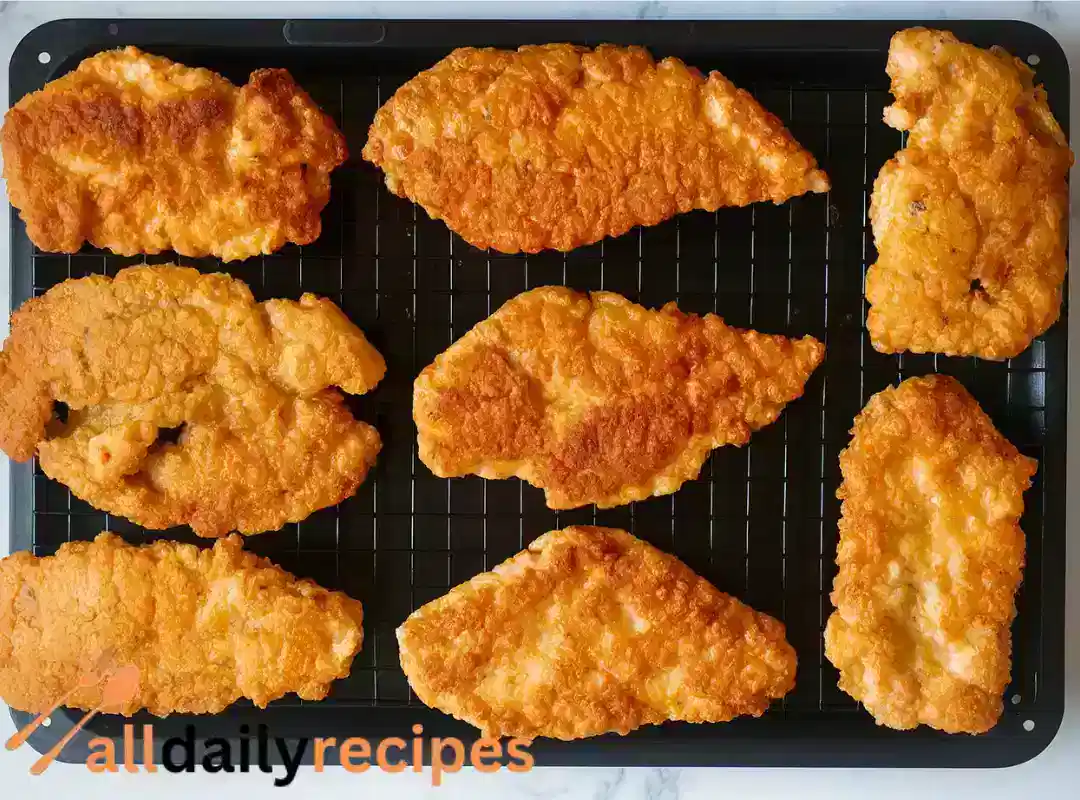
When done, transfer the chicken to a rack set over a baking sheet. This keeps the crust crisp instead of soggy. Continue with the rest, adding a little more butter and oil as needed.
Step 5: Rest and enjoy
Let the chicken sit for a couple of minutes so the juices settle. Then serve it hot and crispy maybe with a squeeze of lemon, a side of mashed potatoes, or tucked into a sandwich.

Tips & Substitutions
- Keep the chicken even in size If one end of the breast is thick and the other thin, it won’t cook evenly. A quick pound with a rolling pin or mallet makes all the difference.
- Use fresh Parmesan if you can Pre-grated doesn’t melt the same and won’t give that nutty flavor in the crust. If you don’t have Parmesan, try pecorino or skip the cheese for a simpler crust.
- Oil choice matters Go with something that can handle heat: vegetable oil, sunflower, canola, or avocado oil. Olive oil tends to burn here.
- Butter for flavor I like a mix of butter and oil. The oil prevents burning, while the butter adds that golden richness.
- Spice it up If you enjoy heat, add a pinch of cayenne or smoked paprika to the flour mix.
- Gluten-free option Swap regular flour for a gluten-free all-purpose blend or even cornstarch for a crispier bite.
- No fresh garlic? Garlic powder works fine. Onion powder and Italian seasoning are also great stand-ins.
Nutrition Information (per serving)
This fried chicken breast recipe makes about 6 servings. Here’s a rough breakdown for one serving (keep in mind these numbers are estimates and can change based on exact ingredients and portion size):
- Calories: 620
- Protein: 45–48 g
- Carbohydrates: 30 g
- Fat: ~34 g
- Cholesterol: 295 mg
- Sodium: 900 mg
- Calcium: 190 mg (thanks to that Parmesan in the coating)
- Iron: 3 mg
These numbers are calculated using a standard nutrition tool and are only a guide. If you need exact numbers for example, if you’re tracking macros it’s best to plug your own ingredients into a trusted nutrition calculator or consult with a registered dietitian.
Serving Suggestions
This fried chicken breast is so good on its own that you could just eat it straight off the rack (and honestly, I usually sneak a piece while the rest is cooling). But if you want to turn it into a full meal, here are a few of my favorite pairings:
- Classic comfort: Mashed potatoes and green beans on the side. Simple, filling, and hard to beat.
- Fresh & light: Slice the chicken and serve it over a big salad with crisp lettuce, cucumbers, and a drizzle of ranch or honey mustard.
- Pasta night: Toss your favorite noodles in a light Alfredo or tomato sauce and add the crispy chicken on top. Instant restaurant vibes.
- Sandwich style: Tuck a piece into a toasted bun with mayo, lettuce, and pickles. Basically a homemade fried chicken sandwich.
- Party platter: Cut the chicken into strips, pile them on a tray, and serve with dipping sauces like barbecue, garlic mayo, or hot sauce. Perfect for game night.
Tips for Success
- Pound the chicken evenly It doesn’t have to be paper-thin, just even. This way the chicken cooks at the same pace, and you won’t end up with one side dry.
- Don’t rush the oil Let the oil and butter get hot before adding the chicken. If you drop it in too early, the coating turns soggy instead of crispy.
- Hands-off frying Once the chicken is in the pan, resist the urge to poke or move it around. Let the crust set, then flip it once. That’s how you get that gorgeous golden coating.
- Drain on a rack, not paper towels A rack keeps the bottom crispy. Paper towels trap steam, and suddenly your chicken’s not so crunchy anymore.
- Cook in batches Overcrowding the pan drops the oil temperature and makes the crust greasy. Give the chicken some space.
- Use fresh Parmesan if possible It melts better and adds a deeper, nutty flavor compared to pre-grated cheese.
Recipe Variations
- Spicy kick Add cayenne pepper or chili powder to the flour mix, or drizzle hot sauce over the fried chicken just before serving.
- Cheesy crust Mix extra Parmesan or even a little cheddar into the breading for a richer, cheesier bite.
- Herb lovers Swap parsley for Italian seasoning, dried thyme, or oregano in the egg mixture for a more herby crust.
- Air fryer option Lightly spray the dredged chicken with oil and cook at 375°F (190°C) for about 12–15 minutes, flipping halfway. It won’t be exactly the same as pan-fried, but still golden and crispy.
- Oven-baked version Place breaded chicken on a greased baking sheet, spray lightly with oil, and bake at 400°F (200°C) for 20–25 minutes.
- Breadcrumb twist Instead of finishing in flour, press the cutlets into panko breadcrumbs after dipping in egg for an extra-crunchy crust.
Frequently Asked Questions
What is the best way to fry chicken breast?
How long does it take to fully fry a chicken breast?
How to pan fry chicken breasts without drying it out?
Do you do egg or flour first for fried chicken?
What’s the secret to juicy fried chicken?
What spices are good in chicken batter?
Conclusion
If you’ve been searching for a way to make fried chicken breast that’s juicy inside and perfectly crispy outside without deep frying this recipe is the one to keep in your back pocket. The flour, egg, and Parmesan crust makes every bite golden and crunchy, while the chicken stays tender.
Serve it with your favorite sides for dinner, slice it over a salad for something lighter, or tuck it into a sandwich when you’re craving comfort food. However you enjoy it, this fried chicken breast is simple enough for a weeknight but special enough to impress.
So grab a skillet, heat up some oil and butter, and get cooking. Once you take that first bite, you’ll know why this recipe is a keeper.

Fried Chicken Breast
Ingredients
Method
- Take your chicken breasts and lay them flat on a board. If they’re on the thicker side, carefully slice them in half to create thinner cutlets. Cover them with parchment and pound gently with a rolling pin for even thickness.
- Sprinkle both sides of the chicken with salt, pepper, and some minced garlic.
- Set up two bowls: one with flour, garlic powder, and onion powder mixed together; the other with whisked eggs, a handful of grated Parmesan, parsley, and a pinch of salt.
- Have a tray ready for dredged chicken.
- Coat a piece of chicken lightly in the flour mix, shake off the excess, then dip into the egg and cheese mixture, followed by another dusting of flour. Repeat until all chicken pieces are coated.
- Heat a skillet over medium heat and add a spoonful of oil and a knob of butter. Once hot, lay down cutlets without crowding the pan.
- Fry without touching for about 4–5 minutes, then flip and cook the other side until golden brown.
- Transfer chicken to a rack set over a baking sheet to keep the crust crisp. Continue frying remaining chicken, adding more butter and oil as necessary.
- Allow the chicken to rest for a couple of minutes before serving. Enjoy with mashed potatoes, salad, or in a sandwich.