
Growing up, there was something magical about the smell of beef taquitos wafting through the kitchen. Family gatherings were filled with laughter, stories, and the warm comfort of delicious food, but the highlight was always those crispy, golden taquitos. As I stood by the countertop, watching my mother carefully roll each corn tortilla filled with seasoned ground beef, I felt that familiar tingle of excitement. The anticipation was almost unbearable, especially knowing how satisfying it would be to bite into one, the savory filling bursting forth. Today, I want to replicate that experience, bringing you an easy and delightful recipe for beef taquitos that will surely become a favorite in your household. With just a few ingredients and straightforward steps, you’ll find that making this crowd-pleaser is easier than you think.
What is Beef Taquitos
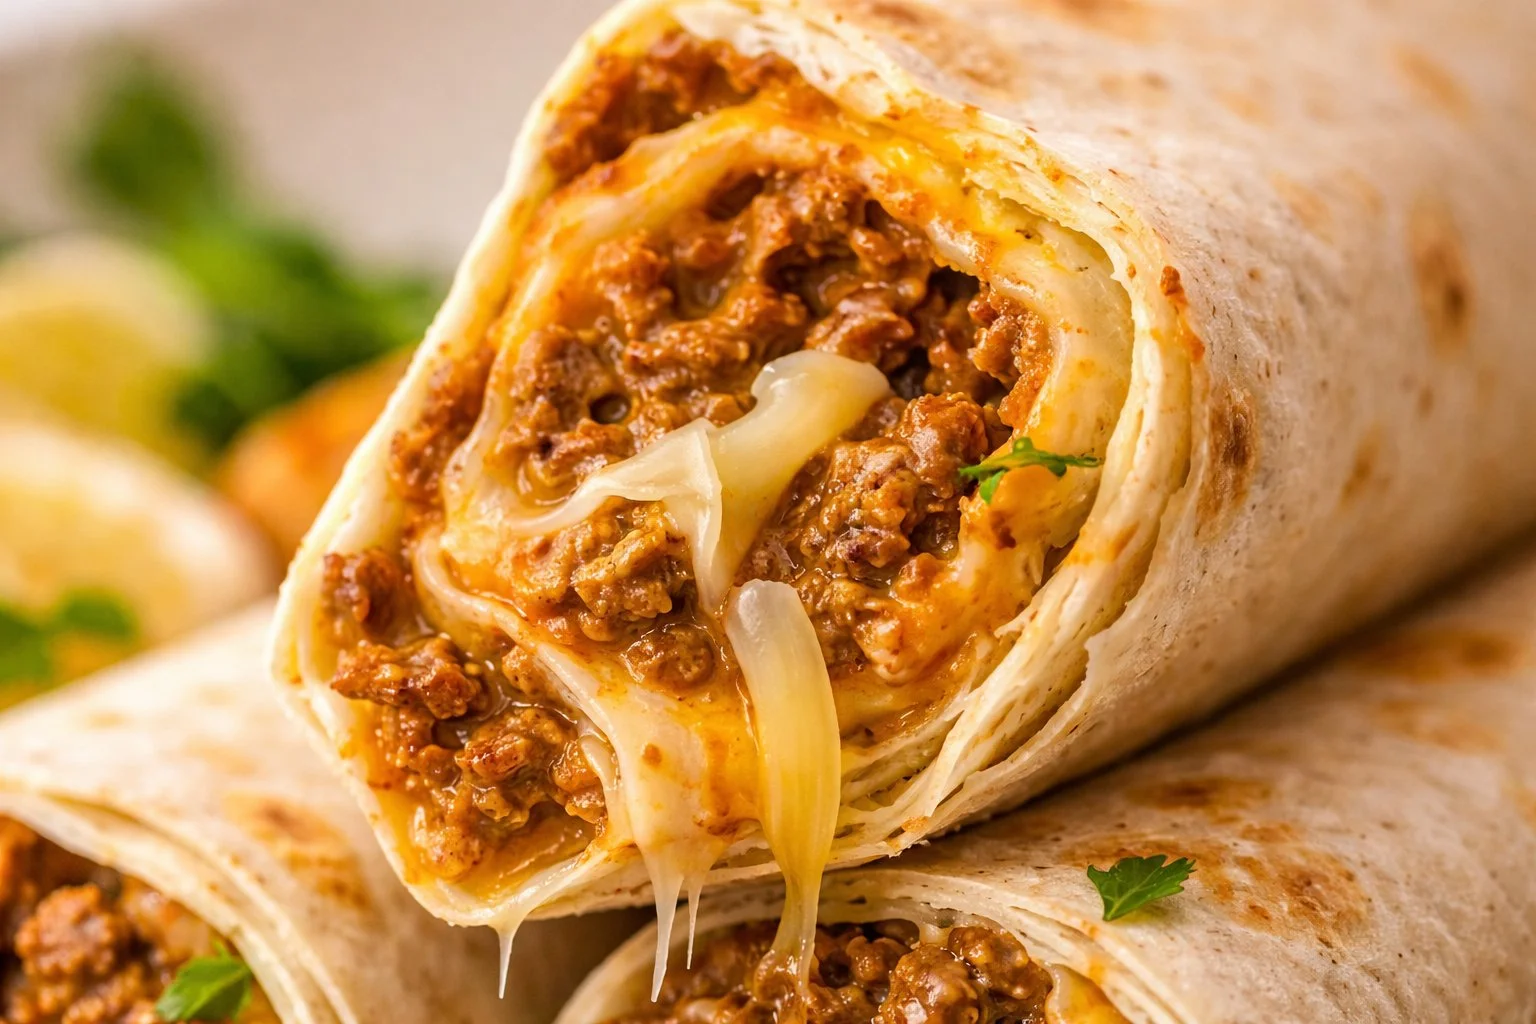
Beef taquitos are a traditional Mexican dish that consists of rolled tortillas filled with a savory mixture, typically ground beef and cheese, then fried to golden perfection. The key to a great taquito is the combination of flavors in the filling, as well as the crispy texture of the tortilla once it’s fried. This dish is often enjoyed as a snack, appetizer, or part of a main meal, and can be served with a variety of sauces and toppings like sour cream, guacamole, or salsa.
Originating from Mexico, taquitos are known by various names depending on the region, including flautas. They are often made to celebrate special family occasions or as a delicious weekday meal. The versatility of beef taquitos makes them appealing to a wide array of taste preferences. You can easily adjust the ingredients to cater to different dietary needs or flavor profiles, making this recipe a staple in many households.
Why You’ll Love This Beef Taquitos:
- Quick and simple to prepare: With a handful of ingredients and a straightforward cooking process, you can have these taquitos ready in no time.
- Family-friendly meal: They appeal to both kids and adults, making them perfect for family dinners or get-togethers.
- Great for beginners: This recipe is easy enough for novice cooks, while still delicious enough to impress seasoned chefs.
- Versatile: You can switch up the fillings or add your favorite toppings to customize each batch.
- Perfect for meal prep: They can be made ahead of time and stored for later, making them an excellent option for busy weeknights.
When gathering around the table to enjoy beef taquitos, you aren’t just sharing a meal; you’re sharing a moment. The crispy texture, combined with the savory filling, brings comfort and satisfaction that’s hard to beat.
Ingredients
To make your delicious beef taquitos, you will need the following ingredients:
- 1 pound ground beef
- 1 tablespoon taco seasoning
- 12 small corn tortillas
- 1 cup shredded cheese (cheddar or Mexican blend)
- Vegetable oil for frying
- Sour cream and salsa for serving
These ingredients create a simple yet flavorful foundation for the taquitos, allowing you to enjoy authentic tastes with minimal effort.
Step-by-Step Instructions for Beef Taquitos
Cook the beef: Start by heating a skillet over medium heat. Once hot, add the ground beef and cook until it becomes browned, breaking it apart as it cooks. Once cooked, drain any excess fat. Next, sprinkle the taco seasoning over the beef, along with a couple of tablespoons of water, stirring until the mixture is well combined and heated through.
Prepare the tortillas: While the beef is cooking, warm the corn tortillas slightly in another skillet or microwave to make them pliable and easier to roll. This step is crucial to prevent the tortillas from cracking.
Assemble the taquitos: On each tortilla, place a spoonful of the beef mixture along with a sprinkle of shredded cheese. Carefully roll the tortilla tightly around the filling, ensuring it stays closed.
Fry the taquitos: Heat vegetable oil in a deep pan over medium-high heat. Once the oil is hot, add the rolled taquitos in batches, frying them until they turn golden and crispy, which typically takes about 2-3 minutes per side. Avoid overcrowding the pan to maintain the temperature of the oil.
Drain and serve: Carefully remove the taquitos from the oil and drain them on paper towels to remove excess oil. Serve hot with your choice of sour cream and salsa on the side for dipping.
With these straightforward steps, you’ll have a batch of delicious beef taquitos ready to enjoy in under an hour.
Pro Tips and Variations:
- Use leftover meat: If you have leftover roast beef or chicken, feel free to shred it and use it as a filling for your taquitos.
- Add vegetables: Frozen veggies like bell peppers and onions can be added to the beef mixture for added flavor and nutrition.
- Try different cheese: While cheddar and Mexican blend cheese are classic choices, feel free to experiment with queso blanco or pepper jack for a kick.
- Baking option: For a healthier version, consider baking the taquitos. Spray them lightly with oil after assembling and bake in an oven preheated to 425°F (220°C) for about 15-20 minutes or until golden brown.
These tips and variations will help you personalize your beef taquitos to suit your taste preferences and dietary needs.
How to Serve Beef Taquitos
Beef taquitos should be served hot and crispy as a delightful appetizer or main dish. Here are some serving suggestions to elevate your dining experience:
- Accompaniments: Pair the taquitos with sides like Mexican rice or a fresh, zesty salad to create a complete meal.
- Garnishes: Top them with chopped cilantro, diced tomatoes, or jalapeños for added flair and flavor.
- Dipping sauces: In addition to sour cream and salsa, you can offer guacamole, hot sauce, or a creamy chipotle sauce for guests to dip their taquitos into.
These serving ideas allow for a variety of tastes and preferences, ensuring that everyone can enjoy your beef taquitos in their own way.
How to Store Beef Taquitos
After enjoying your freshly made beef taquitos, you might have leftovers to store. They can be easily refrigerated or frozen to enjoy later:
- Refrigeration: Allow the taquitos to cool completely, then store them in an airtight container in the fridge for up to 3 days. Reheat in a hot oven to preserve their crispiness.
- Freezing: If you want to keep them longer, the taquitos can be frozen before frying. Place the rolled taquitos on a baking sheet lined with parchment paper, freeze until solid, then transfer them to freezer bags. They can be stored for up to 2 months. When ready to cook, fry them straight from frozen; there’s no need to thaw.
To reheat, place them back into a hot oven or air fryer, giving them a few extra minutes to regain their crispy texture.
Nutrition Information
While enjoying these flavorful beef taquitos, it’s essential to be aware of their nutritional content. Here’s a general breakdown of the nutrition for one serving (approximately 2 taquitos):
- Calories: 350
- Protein: 20g
- Fat: 18g
- Carbohydrates: 30g
- Fiber: 2g
- Sugars: 1g
These values can vary depending on specific ingredients and portion sizes. For a healthier spin, consider using lean ground beef or turkey and baking instead of frying.
FAQs Beef Taquitos
Can I make taquitos ahead of time?
Yes! You can prepare and assemble the taquitos ahead of time, freeze them, and then fry them when you’re ready to serve.What kind of tortillas should I use?
Small corn tortillas are traditional for taquitos. If you prefer flour tortillas, you can use them, but they might not achieve the same crispy texture.Can I use a different protein?
Absolutely! Ground chicken, turkey, or even plant-based proteins can be excellent alternatives for filling your taquitos.What’s the best way to keep taquitos crispy?
To ensure they remain crispy, avoid stacking them after frying and keep them in a warm oven until ready to serve.
Conclusion
Beef taquitos are not only a delicious snack but also a charming reminder of family and tradition. With their crispy exterior and savory filling, they create a satisfying experience that’s hard to match. So gather your ingredients, follow this simple recipe, and enjoy crafting your own batch. Don’t forget to share your experience and any delightful twists you added to this classic dish!