
There’s something magical about creating treats in the kitchen that transport you back in time. I remember the first time I made Butterfinger Bliss Balls for a family gathering; the excitement on everyone’s faces was priceless. These little bites of heavenly goodness are like a package of nostalgia wrapped in chocolate and sweetness. Combining peanut butter, graham cracker crumbs, and crushed Butterfinger bars, they certainly deliver a delightful crunch and mouth-watering flavor that leave you craving more. They embody the fun of baking without requiring extensive culinary skills—perfect for anyone looking to whip up a quick, satisfying treat.
What is Butterfinger Bliss Balls
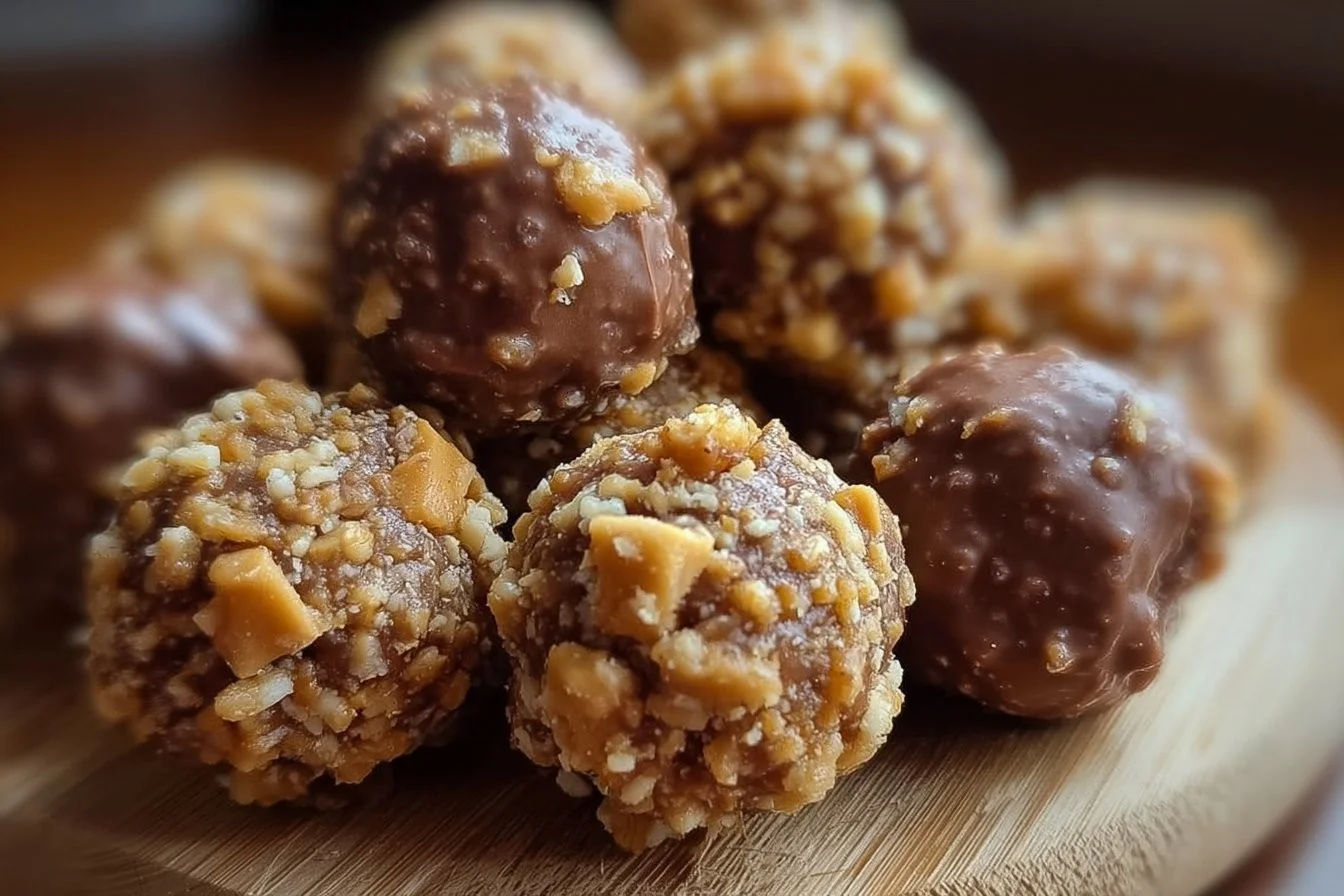
Butterfinger Bliss Balls are no-bake treats inspired by the beloved Butterfinger candy bar. They combine creamy peanut butter, crunchy graham cracker crumbs, and the iconic taste of Butterfinger for a mouthwatering snack. These bites are typically coated in chocolate, offering a rich contrast to the interior’s sweet and nutty flavor. Easy to make and utterly delicious, they are perfect for parties, kid-friendly snacks, or a sweet pick-me-up after a long day. Best of all, they require no baking, making them accessible to everyone.
Why You’ll Love This Butterfinger Bliss Balls:
Whipping up a batch of Butterfinger Bliss Balls has its perks, and here’s why you’ll fall in love with this recipe:
- Quick and simple to prepare: With just a few easy steps, you can create these delightful treats in no time.
- Family-friendly snack: They’re perfect for kids and adults alike; everyone loves a chocolatey treat!
- No-bake convenience: Skip the oven and enjoy a cool, refreshing dessert that’s great for warm days.
- Customizable flavors: Feel free to play around with different add-ins or chocolate coatings to make them your own.
Each bite of these bliss balls embodies the creamy, crunchy flavor we adore about Butterfinger bars, yet they are also versatile. You can make them for any occasion, whether a birthday party, family dinner, or just as a treat for yourself.
Ingredients
– 1 cup creamy peanut butter
– 1 cup graham cracker crumbs
– 1 cup Butterfinger candy bars, crushed
– 2 cups chocolate chips
– 1 tablespoon coconut oil (optional)
Step-by-Step Instructions for Butterfinger Bliss Balls
Creating Butterfinger Bliss Balls is straightforward and enjoyable. Follow these simple steps:
- In a large bowl, combine the creamy peanut butter, graham cracker crumbs, and the crushed Butterfinger bars, mixing well until fully incorporated.
- Roll the mixture into small balls, about one inch in diameter, ensuring they are compact and hold their shape.
- In a microwave-safe bowl, melt the chocolate chips along with the coconut oil (if using) in 30-second intervals. Stir well after each interval until the chocolate is smooth and fully melted.
- Dip each ball into the melted chocolate, ensuring they are completely coated for an extra layer of indulgence.
- Place the chocolate-covered balls on a baking sheet lined with parchment paper to prevent sticking.
- Refrigerate for about 30 minutes or until the chocolate coating is firm and set.
- Once set, serve and enjoy your delectable Butterfinger Bliss Balls with friends and family.
These no-bake treats can be thrown together quickly, but the delicious flavor they provide will impress anyone who tries them.
Pro Tips and Variations:
While the original Butterfinger Bliss Balls recipe is delicious, experimenting with variations can elevate your treats even further. Here are some pro tips and customization ideas:
- Adjust sweetness: If you prefer a less sweet treat, try reducing the amount of sugar in the peanut butter or using a natural peanut butter.
- Add texture: Incorporate finely chopped nuts or sprinkle some sea salt on top for an added crunch and contrast in flavor.
- Alternate coatings: Instead of chocolate, consider using white chocolate or even yogurt-covered coatings for a twist.
- Dietary adjustments: Substitute almond butter or sun butter for peanut butter to accommodate allergies. You can also use gluten-free graham crackers for a completely gluten-free version.
These small tweaks make for a unique flavor experience while keeping the spirit of Butterfinger Bliss Balls intact.
How to Serve Butterfinger Bliss Balls
Serving Butterfinger Bliss Balls is as fun as making them! Here are some delightful ways to present this treat:
- Dessert Platter: Arrange them on a decorative platter alongside fresh fruit for a colorful display.
- Gift Idea: Package them in a cute box or jar with a ribbon as a thoughtful gift for friends or neighbors.
- Party Snack: Serve them at parties or gatherings alongside other snacks for a delightful dessert table that guests can help themselves to.
These bites are versatile enough to suit any occasion, whether you’re serving them at a gathering or enjoying them solo.
How to Store Butterfinger Bliss Balls
If there are any Butterfinger Bliss Balls left after your gathering, you’re in luck—they store quite well! Here’s how to keep them fresh:
- In the refrigerator: Place leftover bliss balls in an airtight container. They’ll stay good for up to a week in the fridge.
- In the freezer: For longer storage, you can freeze them for up to three months. Just ensure they are in a freezer-safe container and separated by parchment paper to prevent sticking.
To enjoy them again, simply take them out of the freezer and let them thaw in the refrigerator until they reach room temperature. This helps retain their flavor and texture.
Nutrition Information
While indulging in Butterfinger Bliss Balls, it’s good to be aware of the nutritional content:
- Serving Size: 1 ball
- Calories: Approximately 120
- Total Fat: 7g
- Saturated Fat: 3g
- Carbohydrates: 12g
- Sugars: 8g
- Protein: 3g
Keep in mind that these figures can vary depending on specific ingredients and quantities used.
FAQs about Butterfinger Bliss Balls
**Q: Can I make these bliss balls vegan?**
A: Yes! Substitute the chocolate chips with dairy-free chocolate and use a vegan peanut butter.
Q: How do I prevent the chocolate from cracking?
A: Ensure that the chocolate is fully melted and that you dip the bliss balls when they are cold to prevent cracking.
Q: Can I use other candy bars in this recipe?
A: Absolutely! Feel free to experiment with different candy bars to create your own unique flavor combinations.
Q: How many bliss balls does this recipe make?
A: This recipe yields about 15 to 20 bliss balls, depending on the size you roll them.
Conclusion
Trying your hand at Butterfinger Bliss Balls is a delightful culinary experience you won’t want to miss. Simple to make yet incredibly satisfying, these treats bring together the nostalgic flavors of the beloved candy bar in a fun and easy way. Share them with your family and friends at your next gathering, or keep them on hand for a sweet snack. Once you experience the joy of making and indulging in these bites of bliss, you’ll want to whip up batch after batch. Give it a try, and don’t forget to share your experience with others!

Butterfinger Bliss Balls
Ingredients
Method
- In a large bowl, combine the creamy peanut butter, graham cracker crumbs, and the crushed Butterfinger bars, mixing well until fully incorporated.
- Roll the mixture into small balls, about one inch in diameter, ensuring they are compact and hold their shape.
- In a microwave-safe bowl, melt the chocolate chips along with the coconut oil (if using) in 30-second intervals. Stir well after each interval until the chocolate is smooth and fully melted.
- Dip each ball into the melted chocolate, ensuring they are completely coated.
- Place the chocolate-covered balls on a baking sheet lined with parchment paper to prevent sticking.
- Refrigerate for about 30 minutes or until the chocolate coating is firm and set.
- Once set, serve and enjoy your delectable Butterfinger Bliss Balls.