
I’ll admit it when I first heard you could make legit, creamy ice cream with just three ingredients and zero fancy machines, I was skeptical. Like… how? Ice cream’s supposed to be this delicate, fussy thing that requires custards, chillers, maybe even a degree in French patisserie.
But here’s the twist: it’s not. At least, not with this version. This 3-ingredient homemade ice cream recipe flips the script. No eggs, no stove, no churners humming on the counter. Just a bowl, a whisk (or mixer if you’re smart), and three ingredients you might already have on hand. And the result? It’s kind of shocking rich, velvety, spoonable straight from the freezer. The kind of treat that makes you go: “Wait… why have I not been doing this the whole time? Whether you’re in it for a late-night craving fix, a project with the kids, or just the thrill of skipping the store-bought stuff, this recipe is designed to give you a win fast, fun, and freezer-worthy.
Table of Contents
Why Try This Homemade Ice Cream Recipe with 3 Ingredients?
Because it delivers something most desserts overpromise: near-instant gratification with zero compromise. It’s the culinary equivalent of getting VIP results from a shortcut nobody told you about and you only need three things.
Let’s face it, traditional ice cream recipes can be… intimidating. Custards. Tempering eggs. Waiting hours to chill a base before you even think about churning. That’s fine when you’re in the mood to fuss. But what about when you’re not?
That’s where this 3-ingredient method shines. It’s fast. It’s nearly foolproof. And it’s surprisingly luxurious not icy, not gritty, just smooth, dense, dreamy texture that scoops like a charm.
The real kicker? You’re not losing quality, you’re just ditching complexity. Heavy cream brings the richness, sweetened condensed milk does the heavy lifting (both sweetener and softener), and vanilla ties it all together. Want to customize? Drop in cookies, swirl in jam, shave in dark chocolate. It’s your pint now.
So if you’re tired of recipes that demand more gear than your kitchen can handle or more time than your schedule allows, this one’s your way back to joy creamy, frozen, satisfying joy.
Ingredients You’ll Need
There’s no secret stash of obscure ingredients here. Just three simple items the kind you probably already have sitting around that somehow pull off what feels like ice cream alchemy.
The Essentials
- 2 cups cold heavy whipping cream
Not half-and-half. Not milk. You want the good, full-fat stuff that actually whips into soft peaks. That’s what gives your ice cream that thick, creamy base. - 1 (14-ounce) can sweetened condensed milk
This is your sugar and your texture magic in one. It keeps things soft enough to scoop and balances out the richness without needing an eggy custard. - 2 teaspoons real vanilla extract
Don’t skip this. Even if you’re adding other flavors, vanilla makes the whole thing feel like, well… actual ice cream. The real kind.
Optional But Highly Encouraged:
If you want to zhuzh it up (and honestly, why not?), fold in about a cup of extras before freezing:
- Crushed cookies (Oreos, graham crackers)
- Chocolate chips, chunks, or curls
- Swirls of peanut butter or caramel
- Spoonfuls of jam or berry compote
- A bit of lemon zest, espresso powder, or cinnamon

Step-by-Step Instructions (3-Ingredient Homemade Ice Cream)
This recipe’s a breeze no machines, no stovetop, and barely any cleanup if you play your cards right. You’ll be mixing, folding, and freezing in under 20 minutes.
1. Whip the Cream
Grab a large bowl (you’ll want space for folding later). Pour in your cold heavy cream and beat it medium speed if you’re using a mixer until you get stiff peaks. That means the cream holds its shape when you lift the beaters. Not soft, not runny. Think: whipped but still silky.
If you’re doing this by hand… pace yourself. It’ll take a few minutes and some bicep commitment, but it’s doable.
2. Mix the Base
In a separate bowl, stir together your sweetened condensed milk and vanilla extract. No need to whip just combine until it looks smooth and a bit glossy.
3. Combine Gently
Scoop about half of your whipped cream into the condensed milk mixture. Now fold don’t stir. Use a spatula and go slow. You’re trying to keep as much air in the cream as possible. Once that’s mixed in, add the rest of the whipped cream and fold again until the mixture’s even and fluffy.
If you’re adding mix-ins (cookies, fruit, etc.), now’s the moment. Fold them in carefully so you don’t knock the air out.
4. Freeze It
Pour the final mixture into a loaf pan or any freezer safe container. Smooth out the top, cover it with plastic wrap (press it against the surface), and slide it into the freezer.
Give it at least 4 hours overnight is best. That’s when the magic happens.
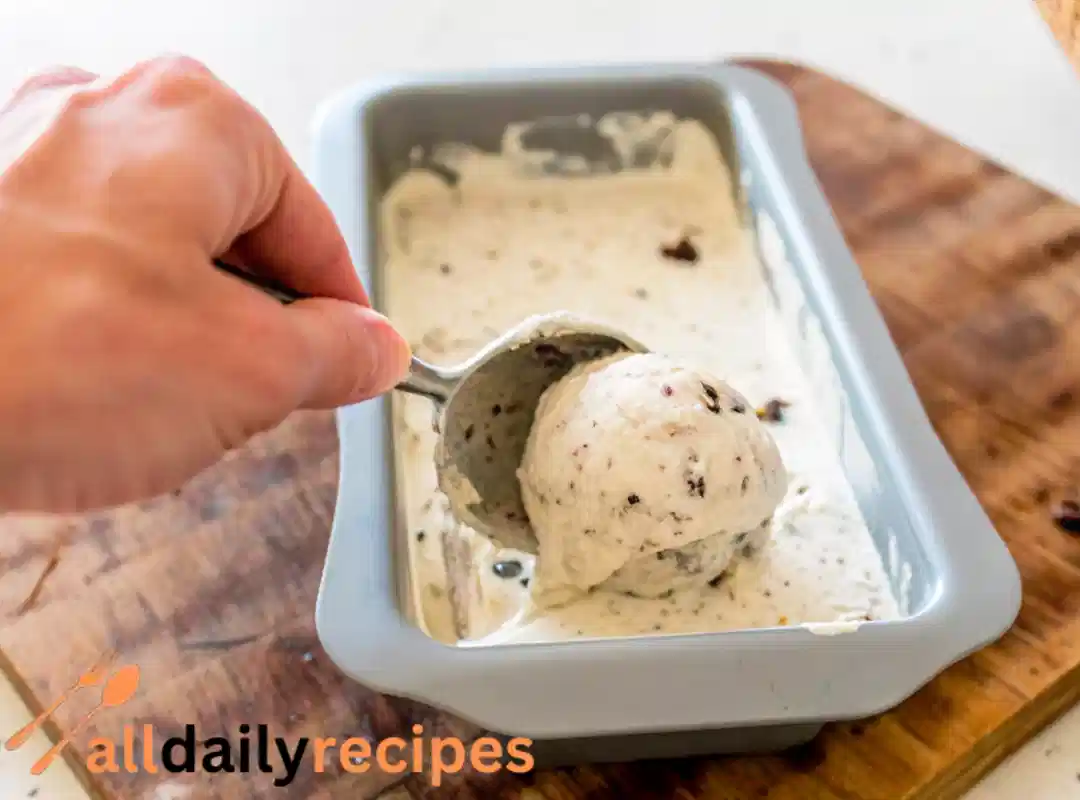
5. Scoop & Serve
Once frozen, scoop it just like you would with store-bought. If it’s a little firm, let it sit for 2–3 minutes before diving in. Cones, bowls, spoons straight out of the container you do you.
Can I make this ahead for a party?
Definitely. Make it up to a week in advance. Just keep it tightly covered to prevent freezer funk or crystal buildup. Bonus points if you serve it in fancy glass bowls with toppings.
Tips for Smooth, Scoopable Texture
Let’s be honest no-churn ice cream can be amazing, or it can end up weirdly icy and hard to scoop. If you’ve tried a version before and thought, “Why does this taste like frozen whipped cream sadness?” here’s how to avoid that fate.
Start Cold, Stay Cold
- Use cold cream straight from the fridge. Warm cream won’t whip right it’ll stay soupy and ruin the texture from the jump.
- If your kitchen’s warm (summer vibes, no AC), chill your mixing bowl too. Just pop it in the freezer for 10 minutes before starting.
Whip It Right
- You’re aiming for stiff peaks not soft, not grainy. Stop as soon as the cream holds its shape but still looks glossy.
- Overwhipping? You’ll get butter-y bits. Underwhipping? Your ice cream won’t hold air and will freeze dense.
Don’t Overmix the Fold
- Folding means gently turning the mix with a spatula not stirring or whisking. It’s like blending a cloud into honey: soft, slow, with respect.
- Overmixing deflates all the air you just whipped in and that’s what keeps it soft post-freeze.
Freeze Smart
- Cover the surface of the ice cream with plastic wrap pressed directly on top this stops ice crystals from forming.
- Freeze flat if possible. A loaf pan is perfect because it freezes quickly and evenly.
- Let the container sit out for 2–3 minutes before scooping. Don’t microwave. Don’t panic. It just needs a moment.
Why does my no-churn ice cream get icy?
Usually, it’s either too much moisture (from fruit or milk-based add-ins) or air got knocked out while folding. Stick to whipped cream, mix gently, and always cover tightly before freezing.
Creative Flavor Variations to Try
Once you’ve got the vanilla base down, the real fun starts. This recipe isn’t just “ice cream” it’s a blank canvas, and you’re the artist with a freezer and a craving. You can go classic, weird, nostalgic, or totally seasonal.
Here are some tested-and-loved combos to get your wheels turning:
Cookie Cravings
- Crushed Oreos or chocolate wafers Instant cookies & cream. Stir them in at the end and freeze.
- Peanut butter swirl + mini pretzels Salty-sweet heaven.
Chocolate Lovers
- Dark chocolate chunks + fudge drizzle Swirl the fudge in after folding the cream.
- Cocoa powder + espresso Add 2 tablespoons cocoa + ½ tsp instant coffee to the condensed milk for mocha magic.
Fruity Vibes
- Chopped strawberries + lemon zest Tart and fresh.
- Blueberry jam ripple Drop spoonfuls and swirl with a knife before freezing.
Dessert Mashups
- Cinnamon toast crunch + caramel Yes, it’s breakfast-for-dessert.
- Chopped brownies + peanut butter Honestly? Just do it.
Seasonal Fun
- Crushed candy canes (holiday vibe)
- Lemon zest + vanilla bean (spring)
- Pumpkin spice + gingersnaps (fall)
You can even mix small test batches if you’re unsure. Divide the base into bowls, try different combos, and freeze them mini-size. That way you’re not stuck with a full batch of something you’re “meh” on.
Can I split the base to try multiple flavors
Totally. Divide the whipped base into smaller containers, fold in different mix-ins, and freeze. It’s like making a sampler flight… but cold and way better than beer.
How Long Does Homemade Ice Cream Last?
Let’s be real: you’re probably going to eat it before this becomes a problem. But just in case you do show restraint (or make a double batch), here’s how to keep your ice cream as good on day 10 as it was on day one.
Ideal Shelf Life
- 2 to 3 weeks in the freezer is your best window. After that, it’s still safe to eat, but the texture can start to suffer think: icier, slightly duller, less creamy magic.
Storage Tips That Actually Work
- Use a freezer-safe, airtight container not just plastic wrap over a loaf pan if you’re storing long-term.
- Press plastic wrap directly onto the surface of the ice cream before sealing the lid. This blocks air, which prevents those annoying ice crystals.
- Keep the container in the back of the freezer, where the temperature stays more consistent.
What to Watch For
- If the ice cream looks gritty or feels hard as a rock, it’s probably taken in a little too much air or moisture. Let it sit at room temp for 5 minutes before scooping it’ll come back to life.
Can I refreeze melted ice cream?
Technically yes, but the texture will never be the same. Once it melts fully and refreezes, you’ll lose the fluffiness and likely end up with a sad, icy block. Scoop what you need, then get it back in the freezer fast.
No Churn vs Custard: What You’re Actually Skipping
If you’ve made ice cream the old-school way you know, whisking egg yolks over heat, tempering with milk, praying nothing curdles you know it’s a bit of a process. Worth it? Sometimes. But necessary? Not always.
What You’re Skipping:
- Eggs: No yolks, no heating, no chance of scrambling your custard mid-recipe.
- Churning: No machines, no watching it spin for 45 minutes.
- Patience-testing prep: No cooking and cooling the base for hours before freezing.
But Here’s What You’re Still Getting:
- Creamy, stable texture thanks to whipped cream and condensed milk
- Scoopable consistency right out of the freezer
- Balanced sweetness and flavor with minimal effort
Honestly? You’re skipping stress more than ingredients.
And if you’re worried it won’t be as “authentic” let your taste buds be the judge. Most people won’t know the difference unless you tell them… and even then, they’ll probably just ask for seconds.
Does this taste like real ice cream?
Yep. Not just “close enough” it’s full-bodied, creamy, and absolutely passes the dessert test. Especially with good vanilla or mix-ins, it’ll hold its own next to the churned stuff, no question.
Frequently Asked Questions (FAQs)
Can I make this ice cream without a mixer?
Yes just grab a sturdy whisk and some patience. It’ll take longer, and your arm might hate you for a minute, but it’s absolutely doable. Chill your bowl beforehand to make the job easier.
What’s the best container to freeze it in?
A loaf pan works great for shape and scoopability, but for longer-term storage, use an airtight freezer-safe container. Bonus if it has a flat lid (less frost).
Is it overly sweet with condensed milk?
It’s sweet but not cloying. The heavy cream helps balance it out. If you’re sensitive to sugar, start with a half-can of condensed milk and taste before adding more.
Can I make it dairy-free?
You can try it using full-fat coconut cream in place of heavy cream and sweetened condensed coconut milk. It won’t be identical in texture, but it’s surprisingly good and has a nice tropical hint.
Can I double the recipe?
Yes just make sure you have a big enough mixing bowl and enough freezer space. You can also split the base into different pans and try a couple flavor combos at once.
Conclusion
Three ingredients. No churn. No eggs. No fuss. It almost feels like cheating but in the best, most delicious way possible.
This homemade ice cream recipe strips things down to the essentials, and somehow, what’s left is everything you want: creamy texture, full vanilla flavor, and room to customize it however you like. It’s a win for weeknights, last-minute dinner guests, and every time you just need a scoop of something joyful.
And the best part? You made it yourself. With a whisk. In your own kitchen. So next time someone says homemade ice cream’s too much work, point them here. Or better yet hand them a cone.
3-Ingredient Homemade Ice Cream
Ingredients
Method
- In a large bowl, whip the cold heavy cream until stiff peaks form.
- In a separate bowl, combine sweetened condensed milk and vanilla extract until smooth.
- Gently fold half of the whipped cream into the condensed milk mixture to lighten it.
- Fold in the remaining whipped cream until well combined.
- Pour the mixture into a freezer-safe container, smoothing the top, and cover with plastic wrap.
- Freeze for at least 4 hours, or overnight for best results.
- Scoop the ice cream and serve in cones or bowls. Let it sit for 2-3 minutes if it’s too firm.