
Have you ever tried a recipe that instantly felt so extraordinary, you just knew it was meant for life’s most special moments? That’s exactly how I felt the first time I baked a wedding cake from scratch. It was for my cousin’s intimate backyard ceremony, and the combination of flavors, textures, and careful decorations left everyone in awe. In this comprehensive article, I’ll share with you the unique techniques, ingredients, and finishing touches that make my wedding cake recipe stand out from others you might find online. Whether you’re a seasoned baker or a kitchen novice, you’ll discover new ideas and tips to help you create a showstopping dessert that will be the centerpiece of any celebration.
Table of Contents
Key Benefits of Making Your Own Wedding Cake
Before we delve into the recipe itself, let’s explore why making your own wedding cake can be such a rewarding and even practical endeavor.
- Cost Savings
- Professional wedding cakes can be extremely expensive. Crafting your own cake can help you save a substantial amount of money, which can then be redirected to other aspects of the wedding or honeymoon.
- Personalization
- When you bake the cake yourself, you have full control over every detail from flavor selection and color palette to the type of decorations that align with your wedding theme.
- Taste and Quality Control
- Nothing beats the flavor of a freshly baked cake made from high-quality ingredients. You decide where you source your flour, sugar, and flavorings, ensuring a dessert that reflects your personal standards.
- Memorable Experience
- The process of baking and decorating a wedding cake can become a cherished memory in itself. Couples often choose to bake together, or friends and family pitch in, making it a communal and heartfelt undertaking.
- Dietary Customizations
- Whether you need a gluten-free, dairy-free, vegan, or nut-free cake, baking your own allows you to tailor the recipe to match dietary needs without sacrificing taste or quality.
- Wow Factor
- A homemade wedding cake garners extra admiration. Guests appreciate the personal touch, and you’ll have a wonderful story to share about how you brought your dream cake to life.
Ingredients
When it comes to wedding cakes, the ingredient list might look similar to other cake recipes at first glance. However, it’s the details and the specific brands or varieties you choose that elevate an ordinary cake to something worthy of a grand celebration. Below is a list of high-quality, fresh ingredients that I have tried, tested, and refined for optimal flavor, texture, and visual appeal.
- Cake Flour (6 cups / ~720 g total, divided among tiers)
- I recommend using a low-protein cake flour like “Cloud Lily” (if available) for a tender crumb. Cake flour’s lower gluten content ensures a lighter texture and soft bite.
- Organic Granulated Sugar (4 cups / ~800 g, divided among tiers)
- A fine-grain, minimally processed cane sugar, such as “Sweet Harvest” brand, tends to cream well with butter and dissolve uniformly in the batter.
- Unsalted Butter (3 cups / 680 g, softened, divided among tiers)
- Opt for a high-butterfat variety from local dairies, if possible look for small-batch brands with around 82% butterfat. This ensures a richer taste and smoother texture.
- Eggs (12 large, room temperature, divided among tiers)
- Choose free-range, organic eggs for a bright yolk color. Room temperature eggs incorporate more easily, yielding a stable batter.
- Baking Powder (4 teaspoons total, divided)
- Make sure your baking powder is aluminum-free and within its expiration date for optimal rise.
- Salt (2 teaspoons total, divided)
- Sea salt or Himalayan pink salt can add subtle depth, enhancing the cake’s natural sweetness.
- Whole Milk (2 cups / ~480 ml, room temperature, divided)
- If you can source locally produced whole milk, go for it. The creaminess boosts the cake’s moisture and flavor. For a dairy-free alternative, use a thick plant-based milk like oat milk or coconut milk.
- Pure Vanilla Extract (2 tablespoons total, divided)
- A good-quality vanilla, such as “Madagascar Bourbon” or “Tahitian” vanilla extract, can make a world of difference in the final taste.
- Flavor Variations (Choose One, Optional)
- Citrus Zest: Finely grate the zest of 2 organic lemons or 3 organic limes for a summery twist.
- Almond Extract: Replace half of the vanilla extract with 1 tablespoon of pure almond extract for a classic wedding cake flavor.
- Lavender Syrup: A subtle floral note can be achieved by folding in 2 tablespoons of homemade lavender syrup during the final mixing stage.
- Buttercream Frosting
- Unsalted Butter (2 cups / 450 g, softened)
- Powdered Sugar (8 cups / 1 kg, sifted)
- Whole Milk or Cream (6–8 ablespoons, as needed)
- Vanilla Extract (1 tablespoon)
- Pinch of Salt
- (Optionally, add flavorings like melted white chocolate, coffee extract, or berry puree)
- Decorative Elements
- Edible Flowers (like organic roses or pansies)
- Fresh Berries (raspberries, blueberries, or blackberries)
- Sugar Pearls, Metallic Dragees, or Fondant Accents
- Colored Gel or Natural Dyes for theme-based tints
Instructions
Each tier of a wedding cake often consists of two or more layers of cake, sandwiched with frosting or flavored fillings. Below is a guide for making a two-tier cake (8-inch base tier and 6-inch top tier). You can scale the recipe up or down for smaller or larger weddings. Plan ahead baking and decorating a wedding cake can take a full day or even two, especially if you’re new to cake assembly.
Step 1 Preparation and Organization
- Read Through the Recipe
- Familiarize yourself with each step. This will help you plan your baking timeline and ensure you have all the necessary tools (e.g., cake pans, offset spatula, turntable, dowels for support).
- Set Out All Ingredients
- Bring eggs, butter, and milk to room temperature for about 30–45 minutes before starting. Pre-measure your dry ingredients.
- Preheat the Oven
- Heat your oven to 350°F (175°C). Adjust racks so that your cake pans sit in the center of the oven.
- Prepare Cake Pans
- Grease your 8-inch and 6-inch round cake pans with butter or cooking spray. Line the bottoms with parchment rounds to prevent sticking.
Step 2 Mix the Batter
(Note: The following instructions assume you’ll make each tier separately for maximum freshness and accuracy. You can also double the recipe and divide the batter, but keep an eye on mixing times to avoid overworking.)
- Cream Butter and Sugar
- In a stand mixer, cream 1½ cups of butter with 2 cups of sugar on medium speed until light and fluffy about 3–4 minutes.
- Add Eggs and Vanilla
- Crack 6 eggs into a separate bowl and add them one at a time to the creamed mixture, beating well after each addition.
- Drizzle in 1 tablespoon of vanilla extract (or half if you’re pairing with another flavor) during this stage.
- Combine Dry Ingredients
- In a separate bowl, whisk together 3 cups of cake flour, 2 teaspoons of baking powder, and 1 teaspoon of salt. If you’re including a flavor variation like citrus zest, fold it in now.
- Alternate Dry and Milk
- With the mixer on low speed, add about a third of the flour mixture, followed by a quarter of the milk. Continue alternating until all flour and milk are incorporated. Avoid overmixing to keep the crumb tender.
- Repeat
- For the smaller tier, repeat the above steps using the remaining half of the ingredients. If you like, you can flavor the two tiers differently (e.g., lemon zest in the 8-inch tier, almond extract in the 6-inch tier).
Step 3 Bake and Cool
- Fill Pans
- Divide each batch of batter equally between the prepared pans (two pans for the 8-inch tier, and two for the 6-inch tier). Level the tops using an offset spatula.
- Bake
- Bake the 8-inch layers for 25–28 minutes, or until a toothpick inserted in the center comes out clean.
- The 6-inch layers will likely need about 20–22 minutes due to the smaller surface area.
- Keep an eye on both sets, rotating pans halfway through to ensure even baking.
- Cool and Level
- Let the layers rest in their pans for 5–10 minutes, then carefully turn them out onto wire racks. Peel off the parchment and allow them to cool completely.
- If any layers have domed tops, level them gently with a serrated knife for a flat, stackable surface.
Step 4 Prepare the Buttercream
- Cream the Butter
- In a clean stand mixer bowl, beat 2 cups of softened butter on medium speed until it’s smooth and slightly fluffy.
- Add Powdered Sugar
- Sift in 8 cups of powdered sugar in increments, mixing on low to prevent a sugar cloud. Scrape down the bowl sides as needed.
- Adjust Consistency
- Pour in 6–8 tablespoons of whole milk (or heavy cream) slowly, monitoring consistency. You want a spreadable texture that’s neither too stiff nor too runny.
- Flavor and Color
- Stir in 1 tablespoon of vanilla extract and a pinch of salt. If using any color gel or natural dye, add it gradually until you reach your desired hue.
Step 5 Assemble and Frost
- Torte the Layers (Optional)
- For an even more impressive presentation, you can slice each cake layer horizontally for a total of four layers per tier. Spread a thin layer of frosting or a fruit filling (like raspberry preserves) between them.
- Crumb Coat
- Place the bottom layer of the 8-inch tier on a sturdy cake board or drum. Apply a thin layer of buttercream on top.
- Stack the second layer. Cover the entire tier with a thin layer of frosting (crumb coat) to lock in loose crumbs. Chill for 15–20 minutes to set.
- Final Coat
- Apply a thicker layer of buttercream, smoothing with an offset spatula or bench scraper. Repeat the crumb coat and final coat process for the 6-inch tier on a separate, smaller board.
Step 6 Stacking the Tiers
- Insert Dowels
- For stability, measure and cut 3–4 wooden or plastic dowels to the height of the 8-inch tier. Insert them evenly spaced around the center.
- Stack the Top Tier
- Carefully lift the frosted 6-inch tier (on its board) and place it on top of the dowelled 8-inch tier.
- Check from various angles to ensure the tiers are aligned and level.
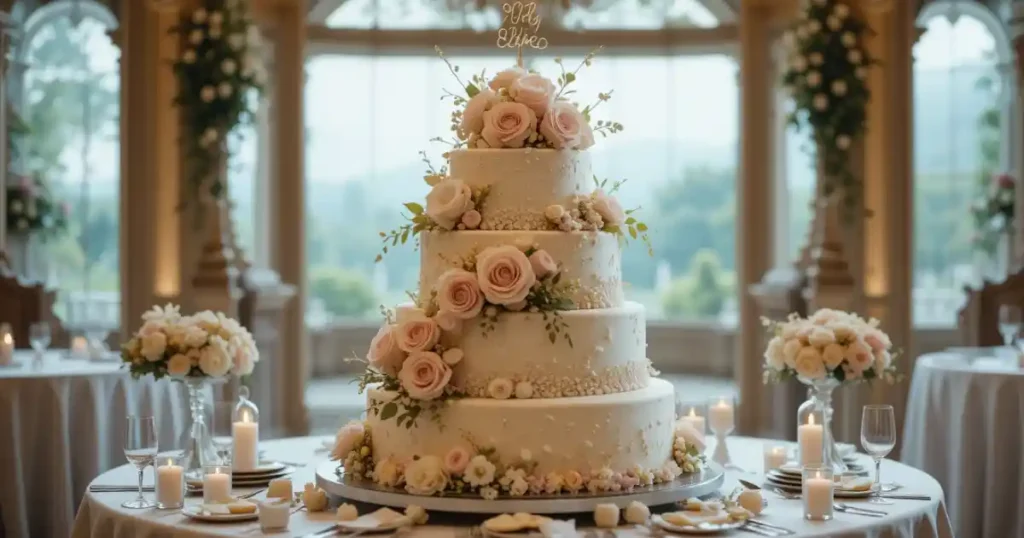
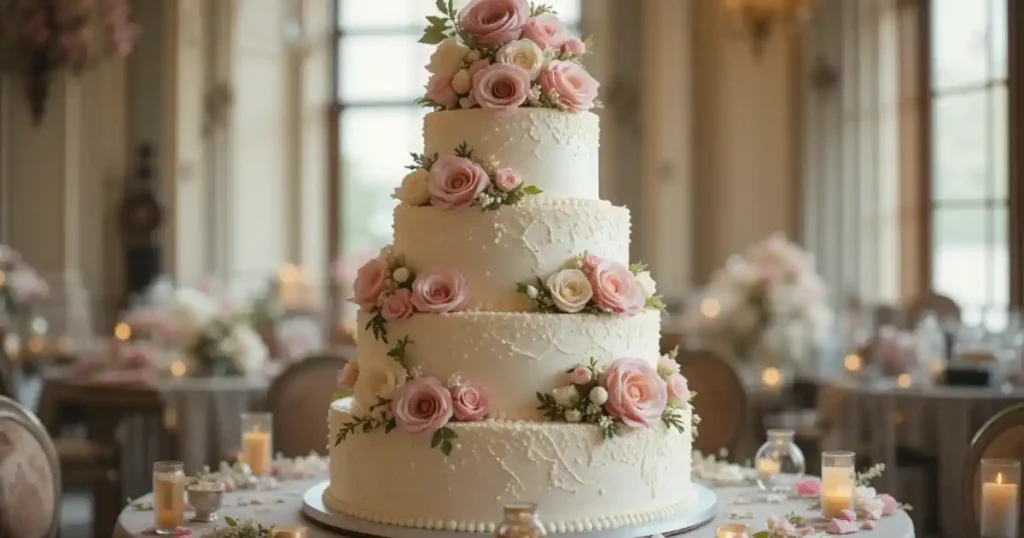
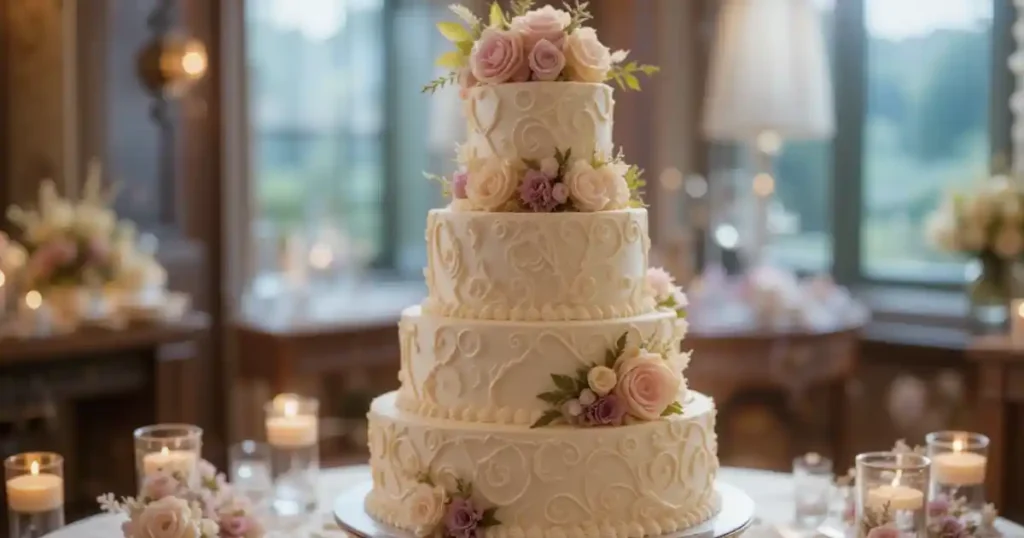
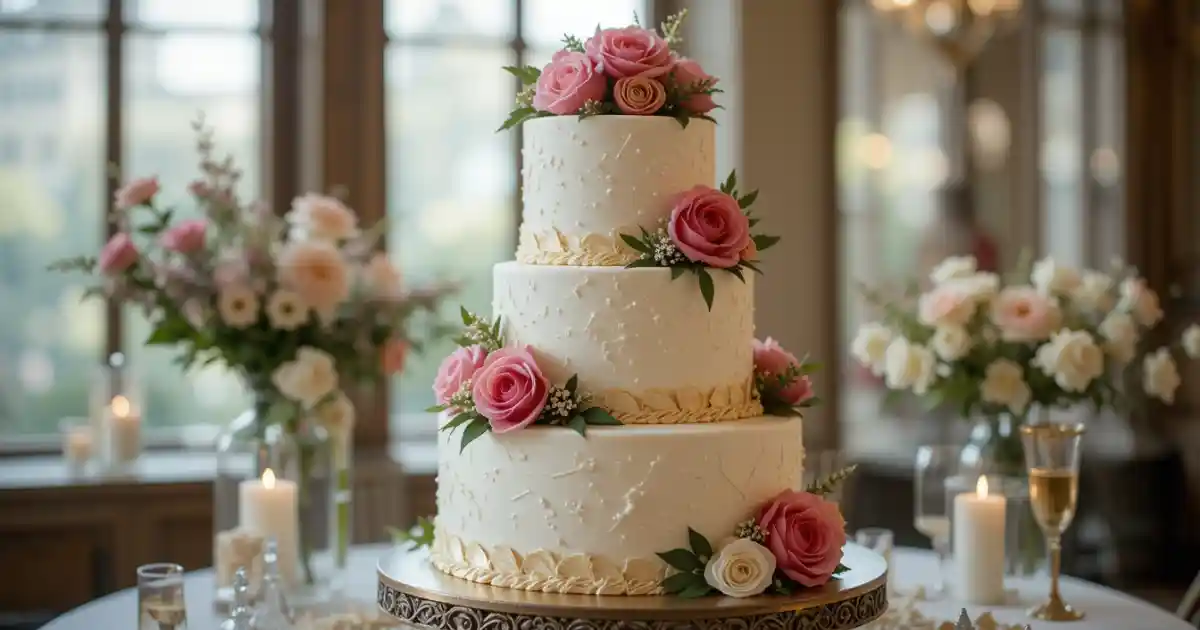
- Decorate
- This is where your creativity shines. Dress up the cake with fresh flowers, edible metallic accents, or piped buttercream details. If you prefer a sleek look, keep the design minimalistic with crisp edges.
Pro Tips and Variations
- Plan and Practice
- If you’re new to multi-tier cakes, make a trial run for a single-tier version ahead of time. Familiarizing yourself with the batter consistency, baking times, and frosting techniques can save stress on the big day.
- Flavor Combos
- White Chocolate Raspberry: Swap half the buttercream with melted white chocolate, and add a layer of raspberry preserves between each cake layer.
- Caramel-Toffee Crunch: Drizzle homemade caramel sauce between layers and sprinkle crushed toffee bits on top before frosting.
- Dietary Alternatives
- Gluten-Free: Use a reliable 1:1 gluten-free baking flour blend and ensure your baking powder, powdered sugar, and other additives are certified gluten-free.
- Vegan: Swap butter for a plant-based alternative, use flax eggs (1 tablespoon ground flaxseed + 3 tablespoons water = 1 egg), and check that your sugar is bone-char-free.
- Low-Sugar: Experiment with sweeteners like erythritol or monk fruit, adjusting ratios based on the product’s sweetness profile.
- Storage and Transport
- Chill your cake well before transporting; a cold cake is less prone to shifting. Use a sturdy, level surface in your vehicle to avoid toppling tiers.
- Piping Tips
- Use piping bags with different tips to create decorative edges, rosettes, or lace-like filigree patterns. Practice on parchment paper before applying designs to the actual cake.
Serving Suggestions
A wedding cake doesn’t have to be served on its own. Elevate the dessert table or buffet by pairing it with complementary treats and refreshments:
- Champagne or Sparkling Cider
- The cake’s sweetness pairs nicely with the effervescence, helping cleanse the palate between bites.
- Fresh Fruit Display
- Offer bowls of strawberries, blackberries, or sliced peaches. Their natural juiciness adds a refreshing contrast to buttercream.
- Coffee and Tea Station
- Provide aromatic coffee blends or herbal teas. Earl Grey’s citrus notes, for instance, can highlight the subtle vanilla undertones in the cake.
- Mini Dessert Samplers
- Create a balanced dessert spread by incorporating macarons, tartlets, or chocolate truffles. That way, guests have a variety to choose from.
Common Questions about Wedding Cake
How far in advance can I bake a wedding cake?
You can bake the layers up to one week ahead and freeze them, tightly wrapped in plastic wrap and foil.Defrost the layers in the fridge overnight before assembling. Frosting and final decorations should be done within 24–48 hours of the event for maximum freshness.
Is it possible to create a tiered wedding cake without dowels?
Technically, you can stack smaller cakes without dowels if the layers are light. However, supports (dowels) are highly recommended for any multi-tier cake to prevent the top tiers from sinking or sliding.
How many people does a two-tier wedding cake serve?
An 8-inch and 6-inch two-tier cake usually serves around 40–50 guests, depending on how large the slices are cut. If you have more guests, consider a three-tier option (10-inch, 8-inch, and 6-inch) or additional kitchen-sheet cakes for backup.
Can I refrigerate a fondant-covered wedding cake?
Yes, you can, but avoid humidity if possible. Fondant can become sticky and shiny when exposed to moisture. If you must refrigerate it, use a box or container to minimize condensation on the fondant’s surface, and let it come to room temperature slowly.
Do I need a cake board for each tier?
Yes. Each tier should rest on its own cardboard or foam board. This not only provides support but also makes it easier to transfer and move tiers during assembly or cutting.
Can I make the decorations ahead of time?
Certainly! Fondant flowers, gumpaste figures, and other sugar art pieces can be made weeks in advance if stored in a cool, dry place. Buttercream accents should generally be made closer to the event date but can be piped ahead and frozen for short periods.
Conclusion
Baking and decorating your own wedding cake might feel like an ambitious project, but it can be one of the most rewarding experiences in a lifetime of culinary adventures. From selecting premium ingredients and mastering the balance of flavors to meticulously stacking and decorating the final masterpiece, every step weaves a personal story into your special day. Not only will you save costs, but you’ll also enjoy complete creative freedom ensuring your wedding cake isn’t just a dessert, but a meaningful reflection of your love and style.
Homemade Wedding Cake
Ingredients
Equipment
Method
- Step 1 – Prepare and Organize: Preheat oven to 350°F (175°C). Grease and line two 8-inch and two 6-inch pans. Bring all ingredients to room temperature and measure accurately.
- Step 2 – Make the Batter: Cream butter and sugar until light and fluffy (3–4 minutes). Add eggs one at a time, then vanilla. In a separate bowl, whisk flour, baking powder, and salt. Alternate adding dry mixture and milk until combined. Repeat for second tier if baking separately.
- Step 3 – Bake and Cool: Bake 8-inch layers for 25–28 minutes, 6-inch layers for 20–22 minutes, or until a toothpick comes out clean. Cool 10 minutes in pans, then transfer to wire racks and cool completely.
- Step 4 – Prepare the Buttercream: Beat butter until creamy. Gradually mix in sifted powdered sugar. Add milk as needed for a smooth texture. Stir in vanilla and salt.
- Step 5 – Assemble the Cake: Level each layer. Apply frosting between layers, then cover each tier with a thin crumb coat. Chill for 15–20 minutes. Apply a smooth final coat using an offset spatula.
- Step 6 – Stack the Tiers: Insert dowels into the bottom tier for support. Place the smaller tier on its own cake board and carefully position it on top. Check alignment and stability.
- Step 7 – Decorate: Add flowers, berries, or fondant details. Keep design simple or ornate depending on theme. Refrigerate briefly before serving or transporting.